Home
Product
Advertising
Television
Films
Sculpture
 |
the Concept |
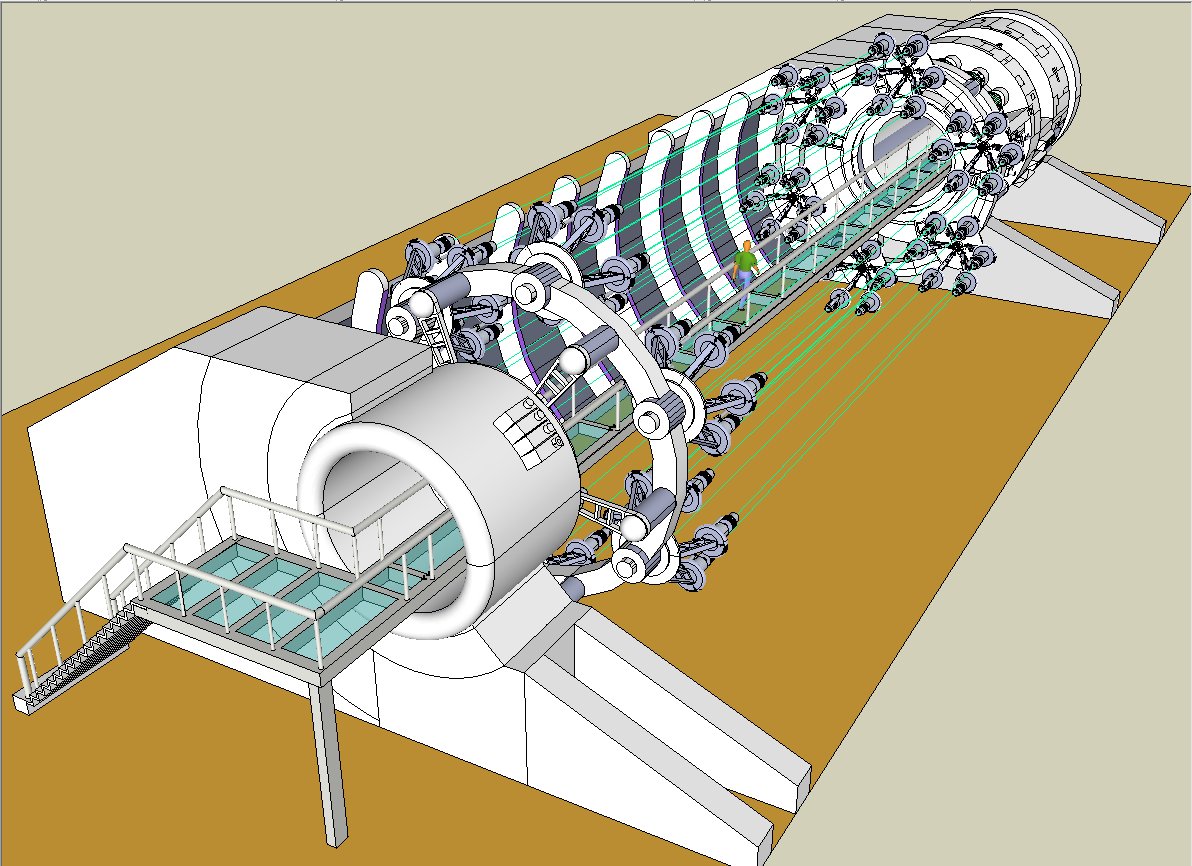
Drawn on GOOGLE SKETCH-UP(free version) after a couple of rejected designs, one of which looked like a giant hair curler. How I was going to make it move wasnt an option. to make it large enough to include motors wasnt something I could do in my lifetime, so a smaller model with just illumination was going to be my route. How to do the filaments would decide the final scale. I decided on using Ultra Violet strands of Acrylic. I bought them at maximum length and made the model around that. In hindsight, Ultra-violet STRING would have been a better way to go. I may go back and install those...one day.. |
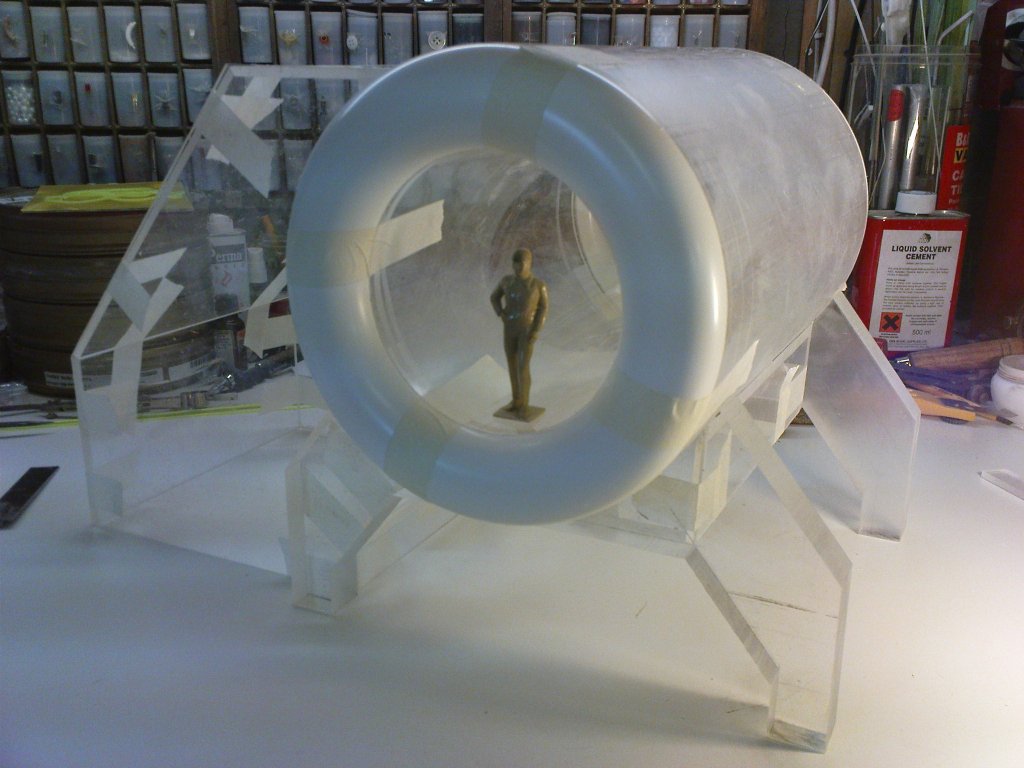 |
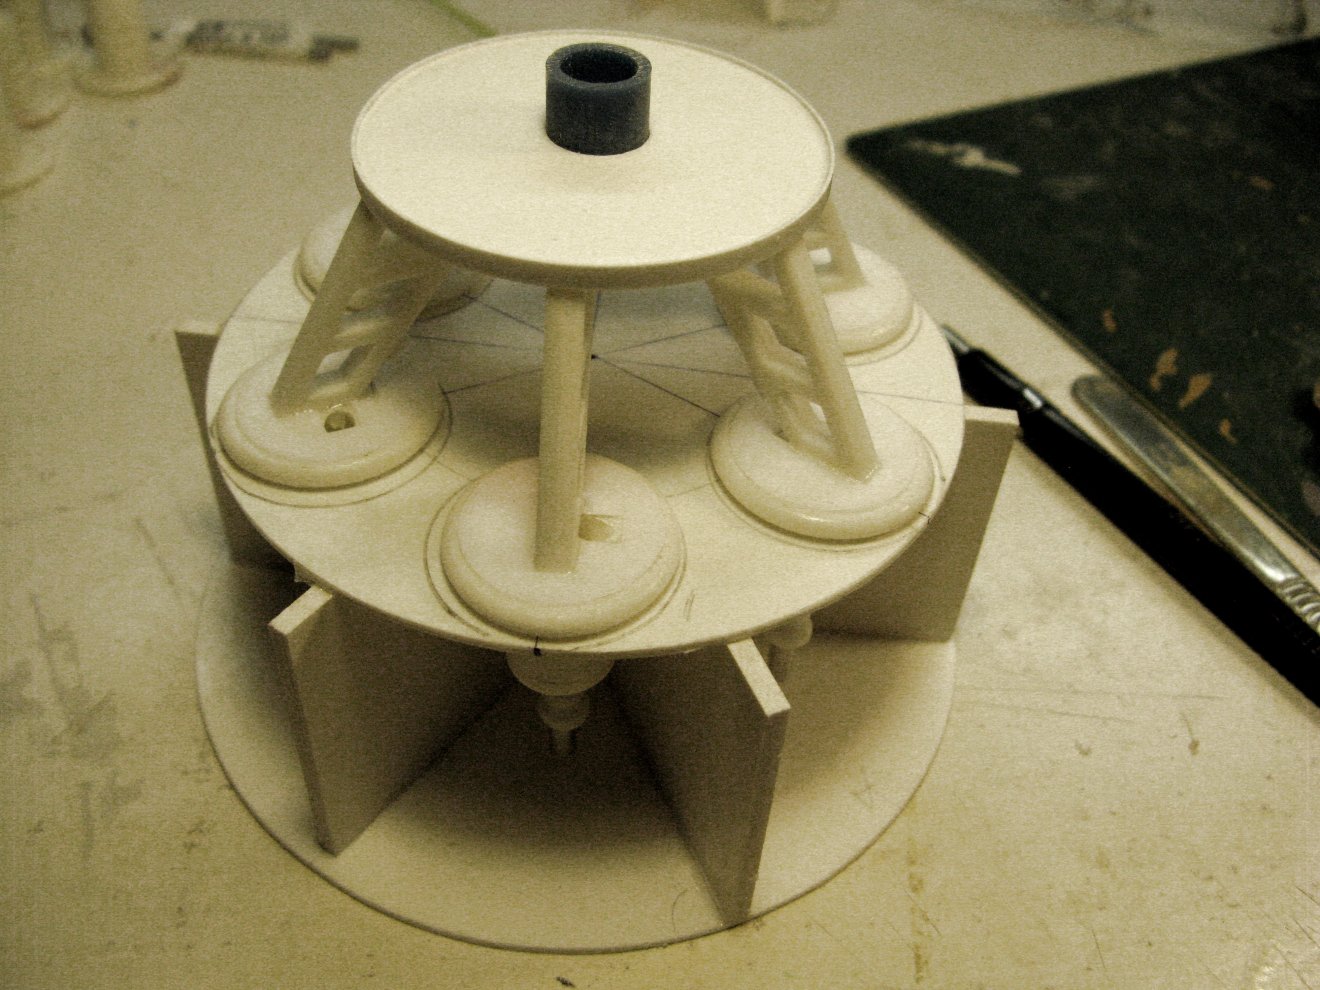
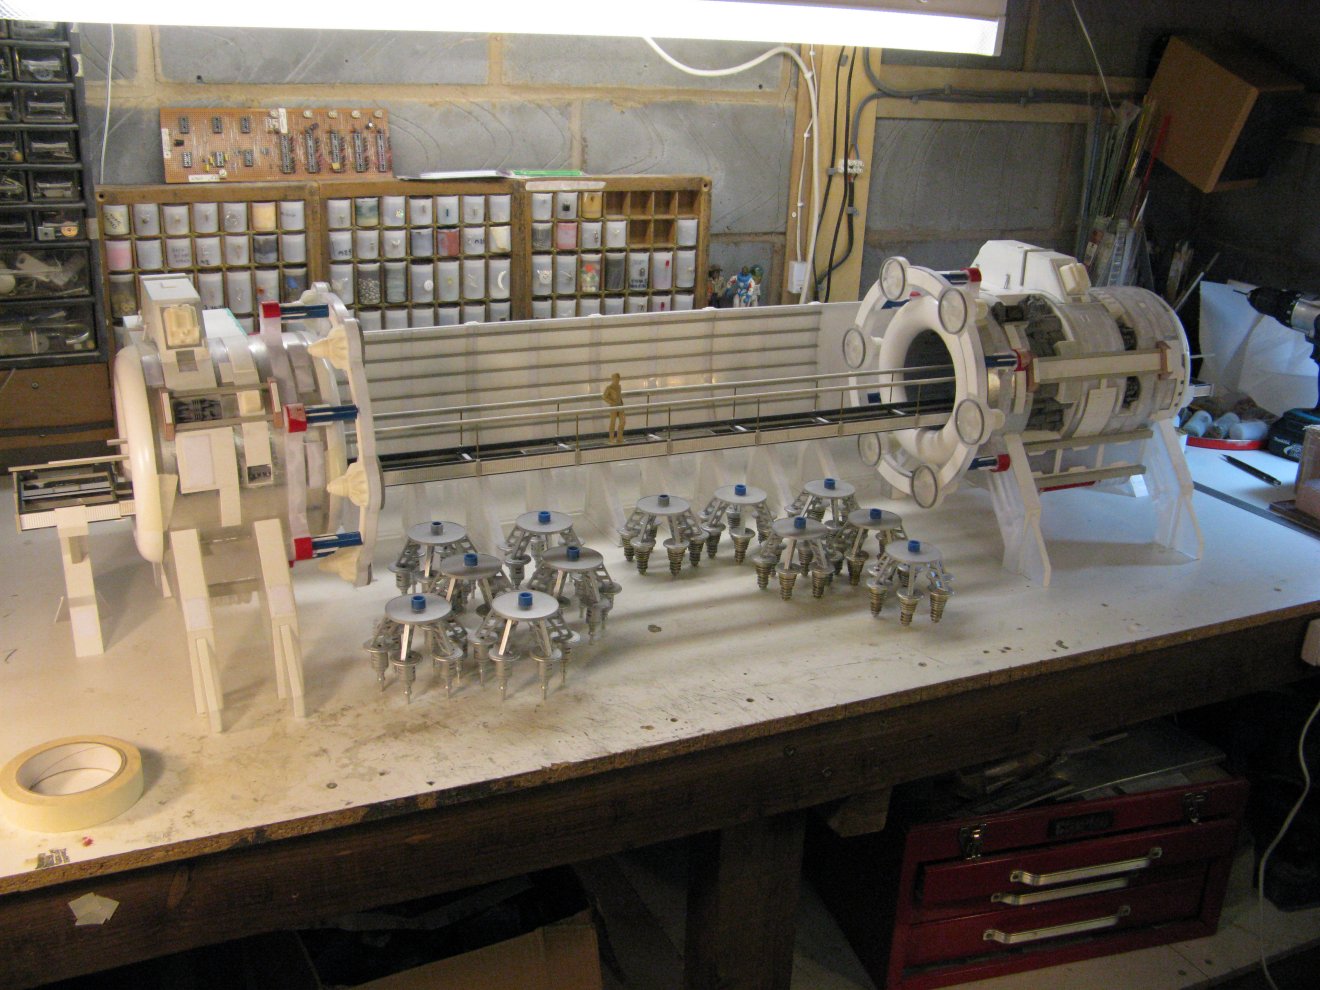
Its going to be big. | This is the first picture I took. Two Diameters of Perspex tube with vac-formed caps either end from a chemiwood pattern I turned on my wood lathe. Solid perspex legs. Something I could drill and tap for bolting the thing down. |
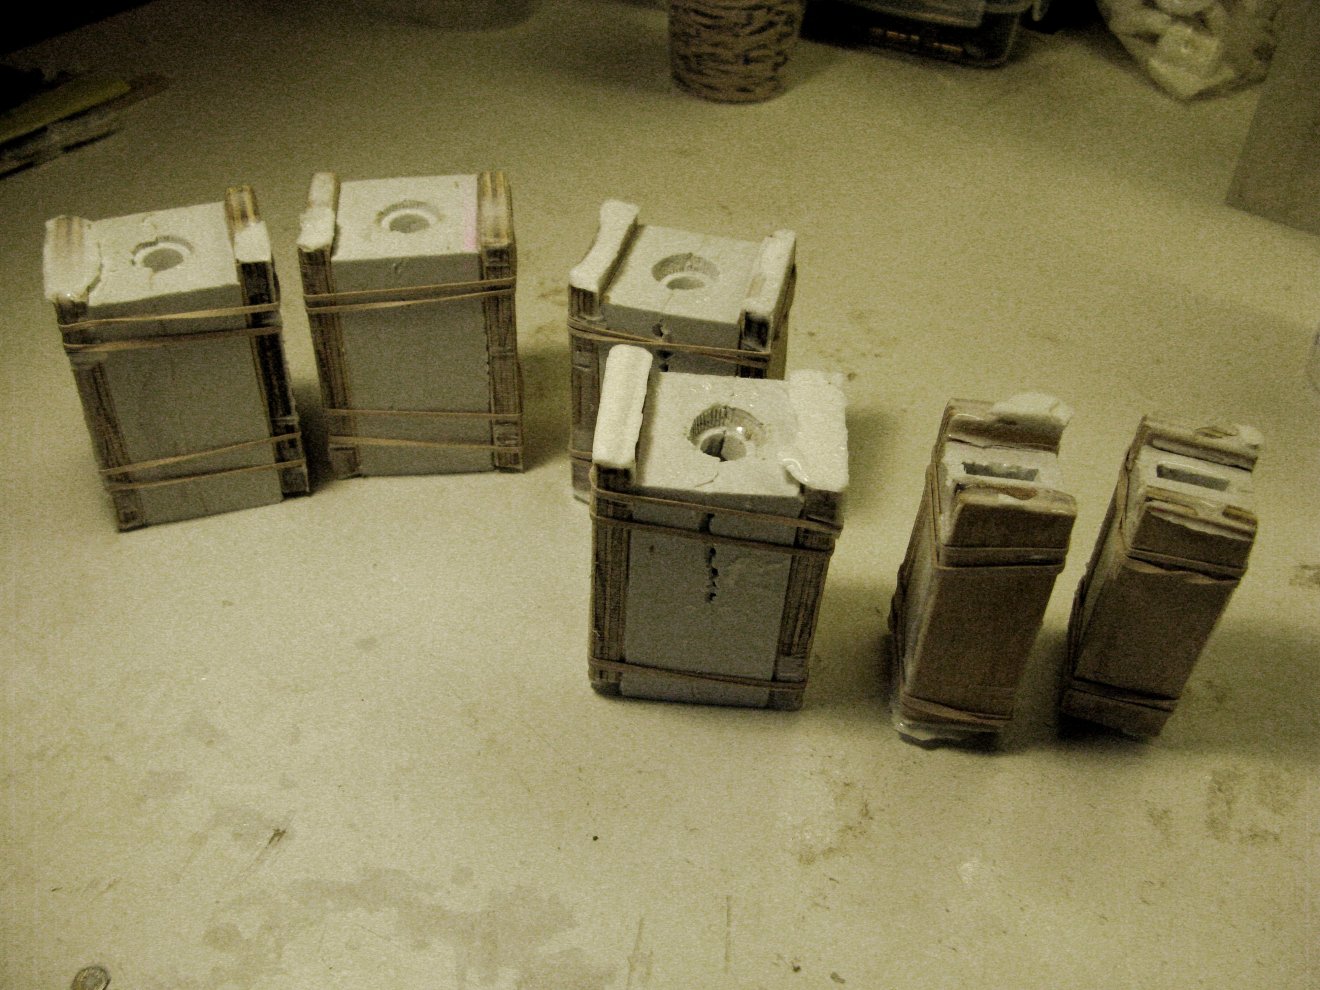 |
Moulds | The units for focussing the lasers/plasma/neutrino beams, what-have-you, were two part moulds with lots of vents as the pattern had lots of fins. a place for bubbles to collect. |
 |
Castings |
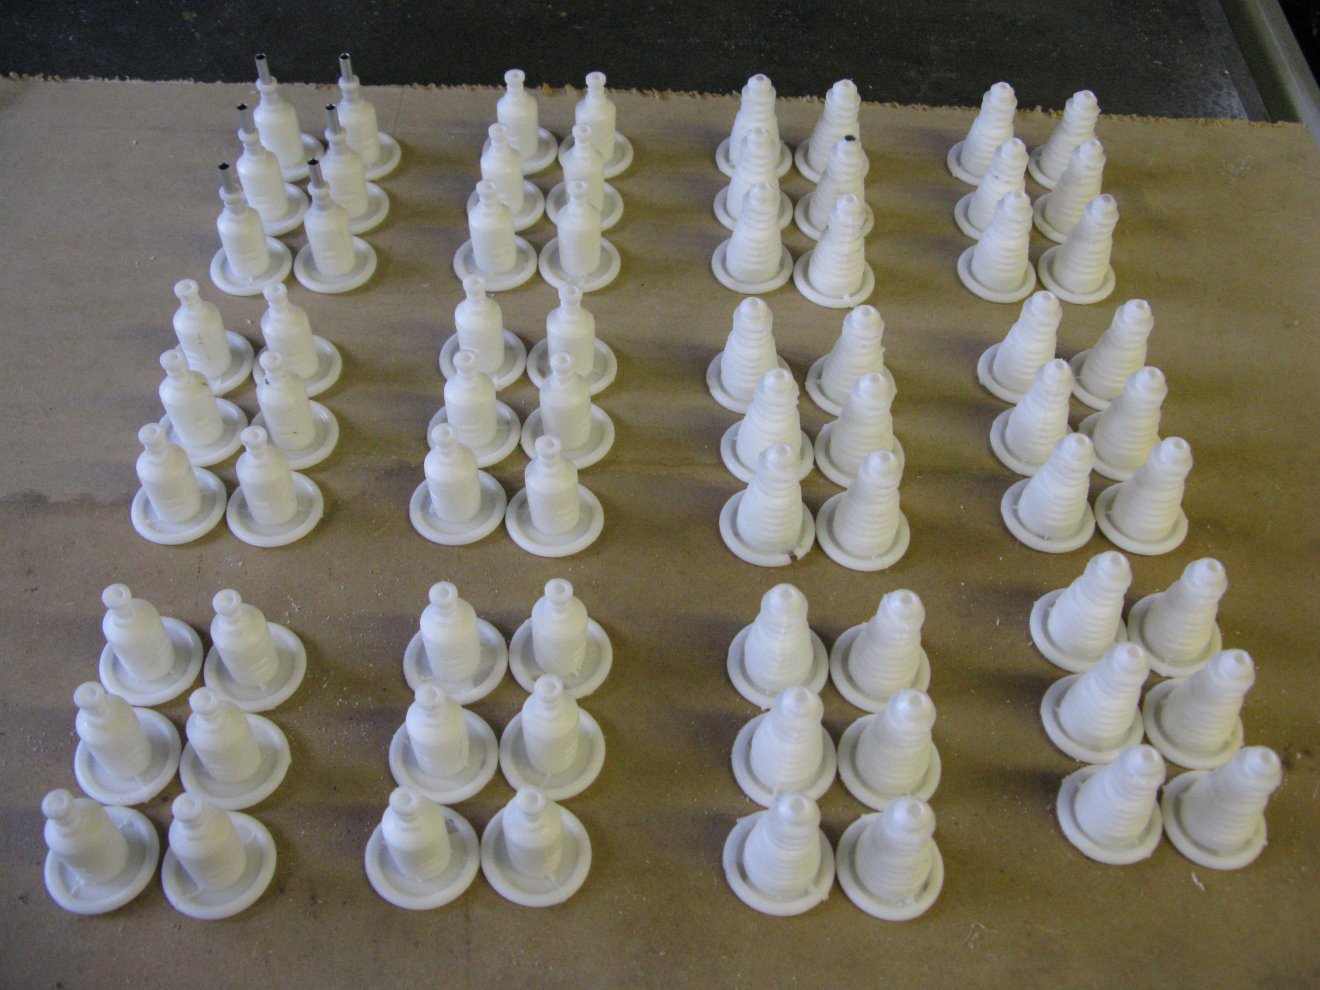
Without de-gassing the silicon properly ( I dont own a vac-chamber), I still managed to get near-perfect castings, with only two bubbles to fill in this whole group. |
 |
Jig |
A jig is always a good idea when repeating a shape, plus It would have been near impossible to glue this together straight and true without one. With hindsight, another piece to locate the tips equidistant would have been good. one or two were a little out...only by a millimeter, but enough to give me problems with the UV rod being straight. |
 |
Many pieces |
With a few Pieces underway, I can now go where the mood (or the construction sequence)takes me. Always thinking ahead. Having laboriously cut the slots in the inner tube, I've lined it with aluminium tape to block the unwanted light from the leds I'll instal later - much later. |
 |
Spine2 |
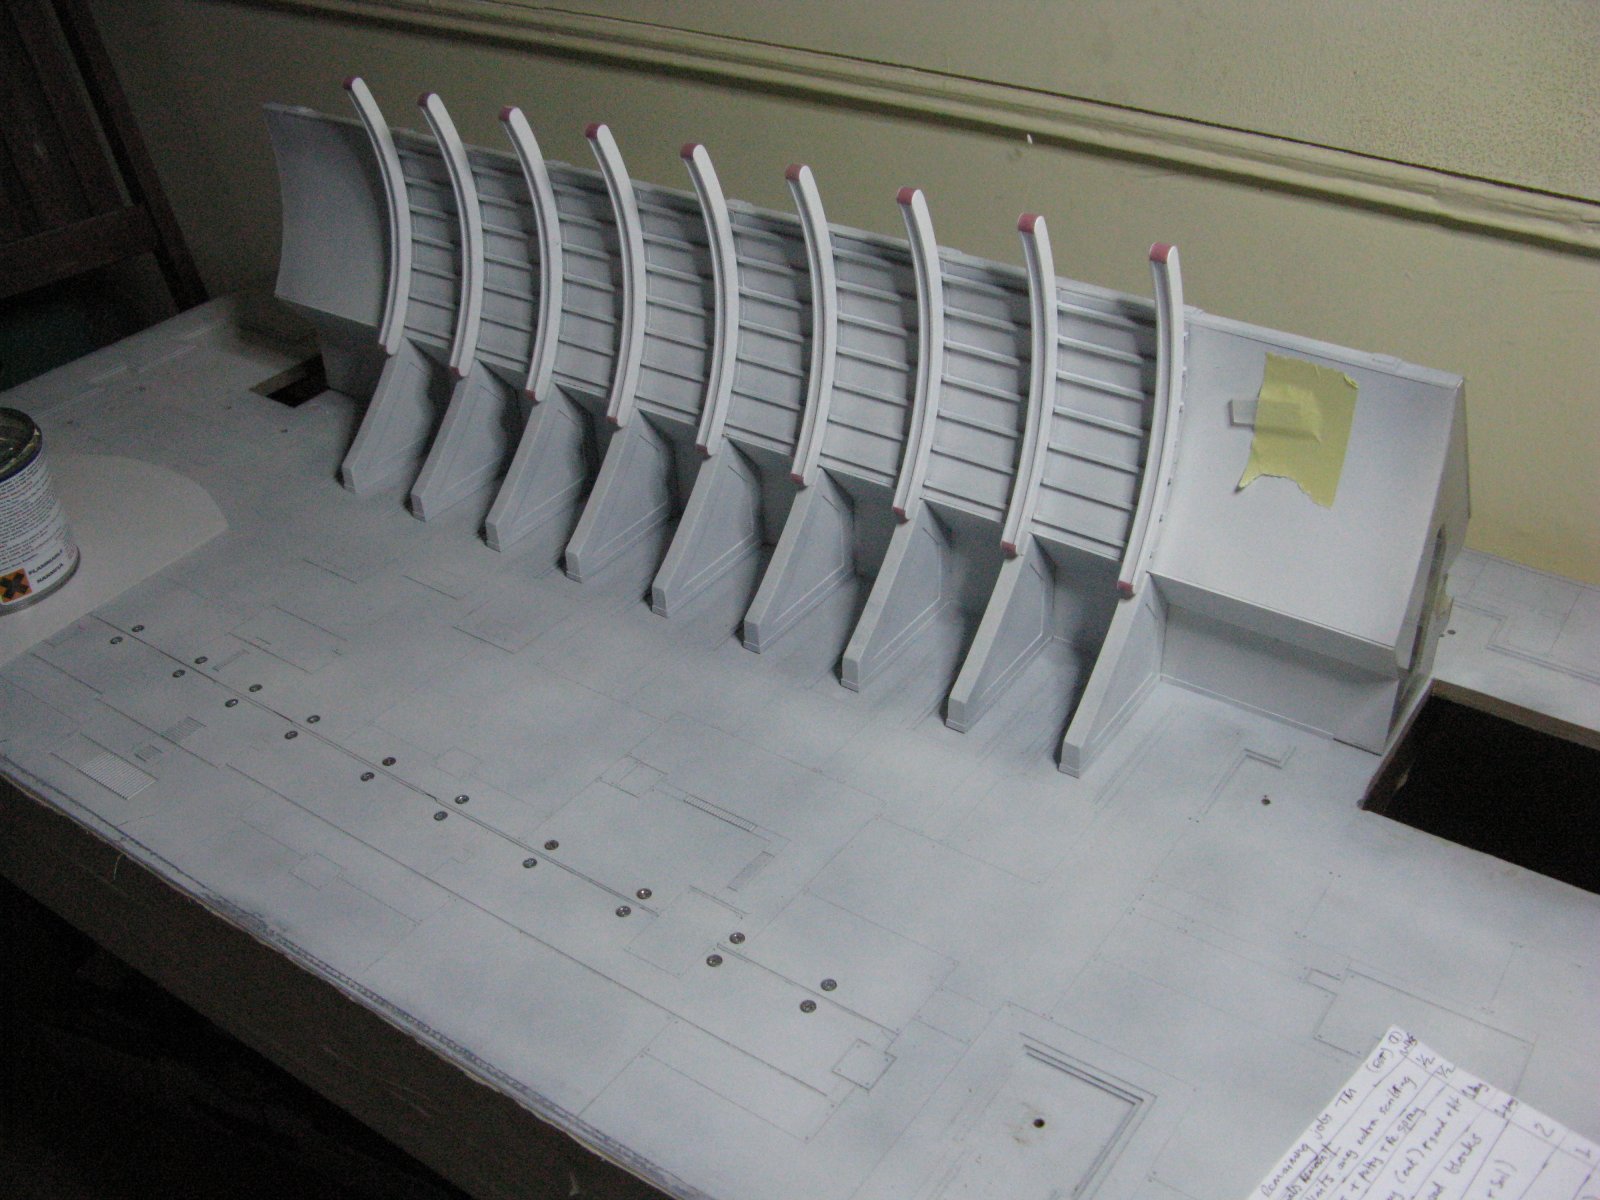
The original drawing didnt even have a 'spine'. the drawing you've seen was after I'd added it. It didnt need it, but I thought it made the machine look stronger and more capable of dealing with the high speeds I'd envisaged it attaining with the rotating arrays. These were to be illuminated as well, But I couldnt afford the electro-luminescent sheeting. |
 |
spinal cord | As the basic shape was pre-designed, the only areas where I could have a bit of creative fun were the recesses where there would be detail. The main one being along the back of the spine....ex girlfiends' razors are in there again!! (no, really) |
 |
taking shape | To spur myself on, I regularly assemble whats been made so far, so I can visualise the thing finished. |
 |
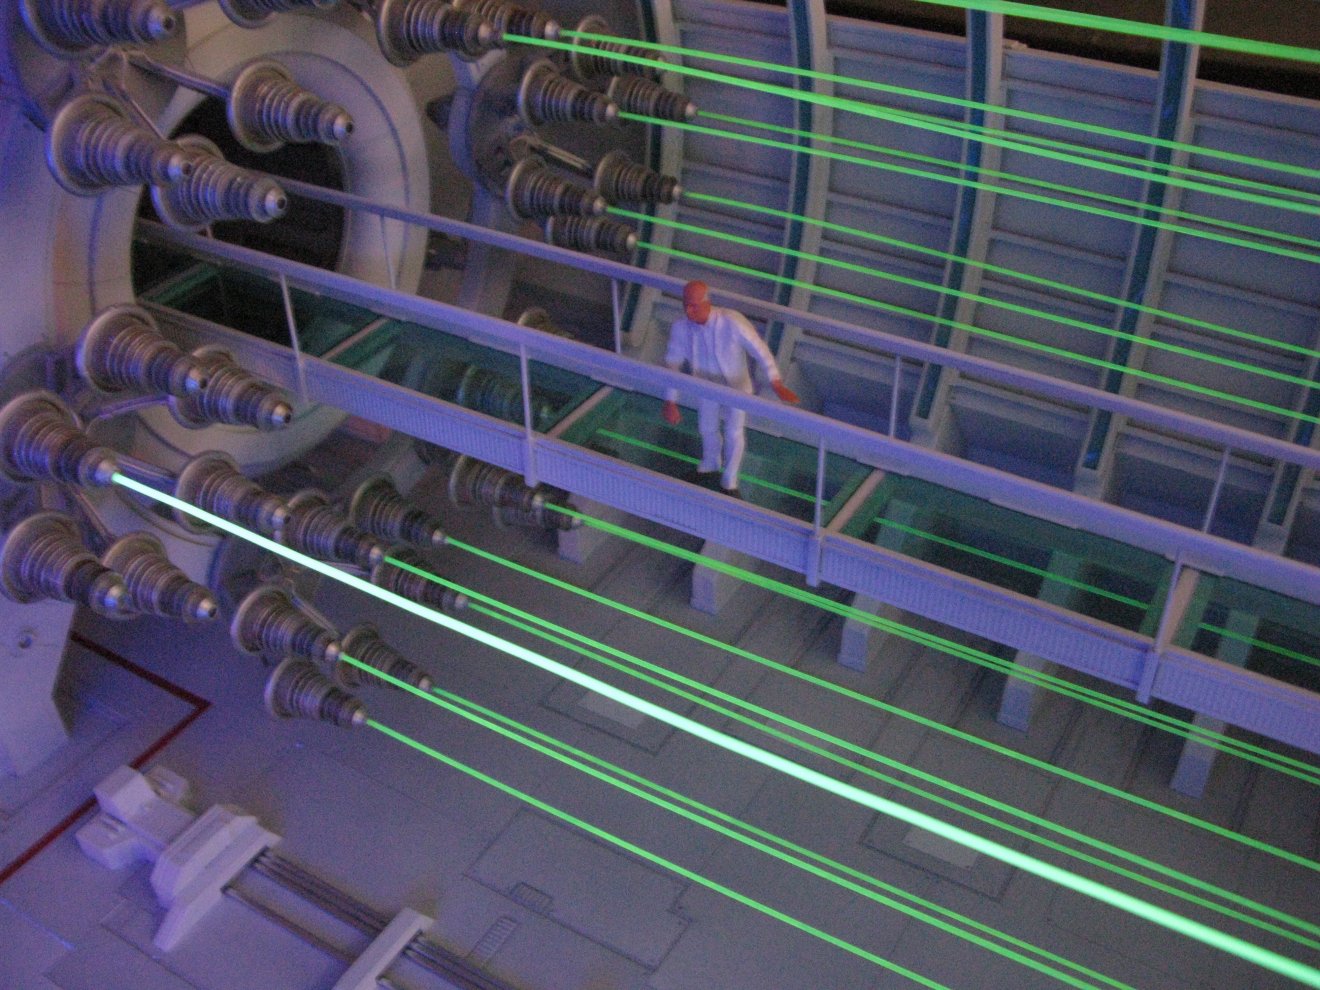
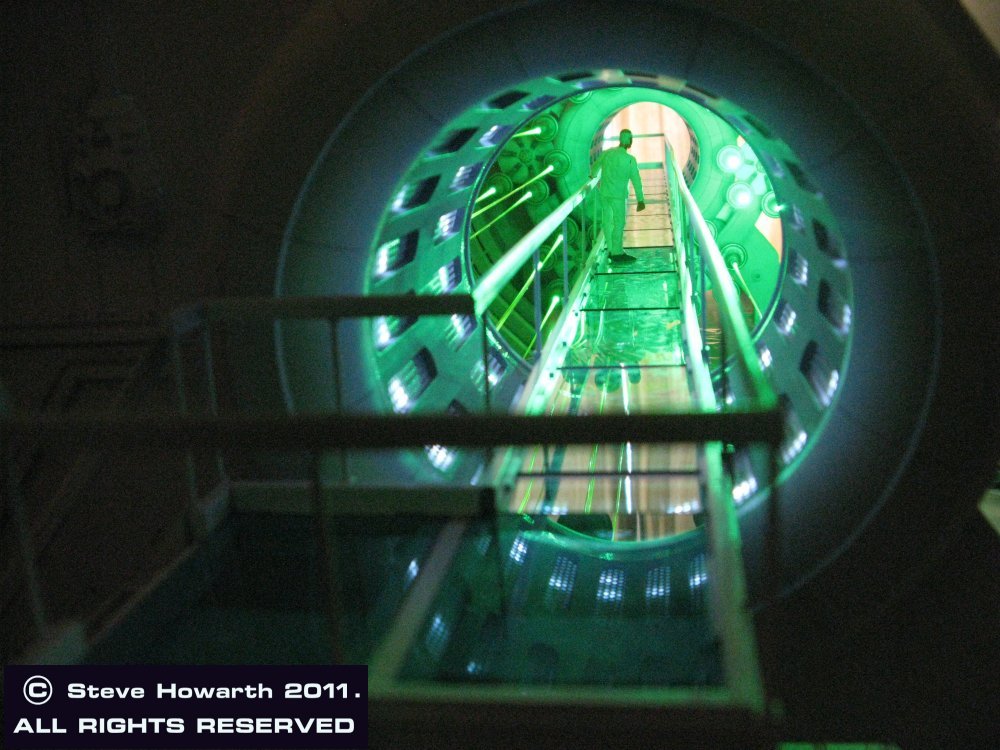
This is gonna work! | the beginnings of the walkway, that our time traveller walks along through the spacetime wormhole thats been created. |
 |
spine1 | The back of the spine unpainted. everything bolts to the baseboard. the ends of which, slot into the large and small ring assemblies. Everything had to be as strong as possible, so nothing would move and the filaments would stay straight. |
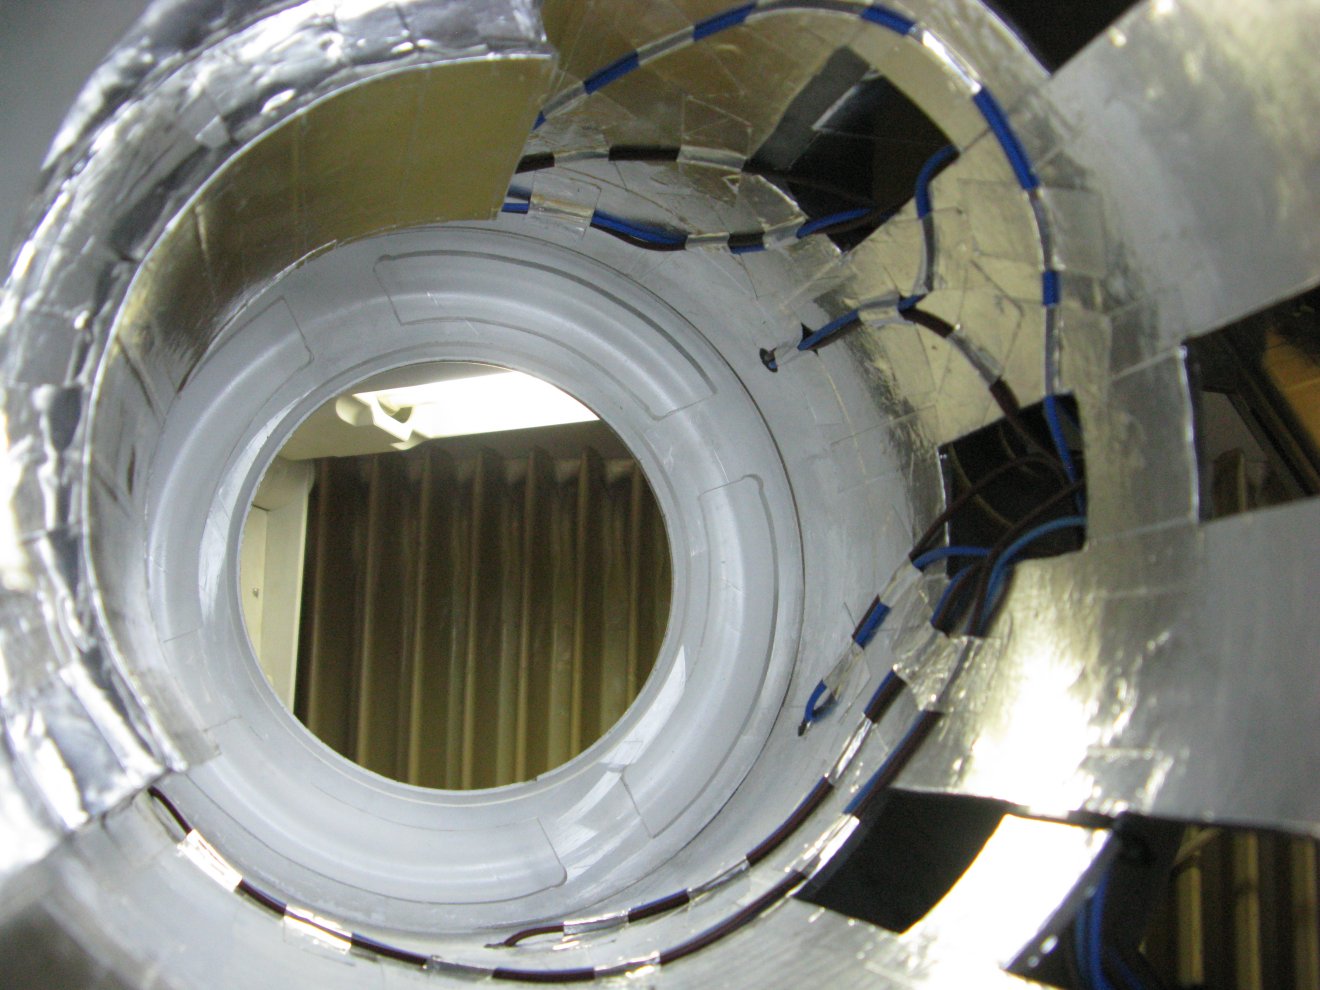 |
Ally foil | Inside, showing some wiring and alluminium foil, used to block unwanted light leakage. |
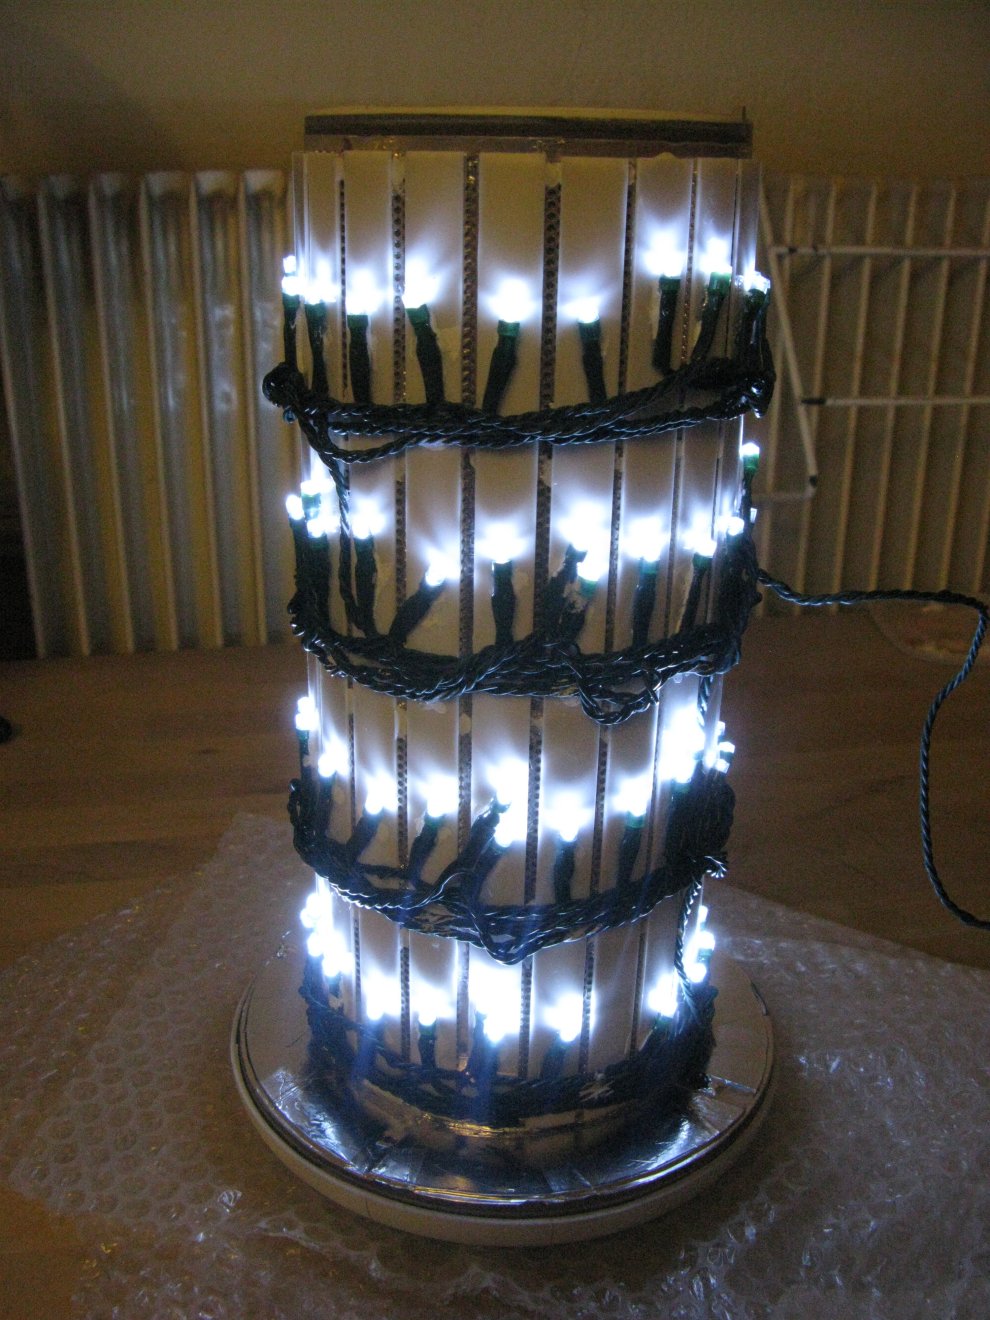 |
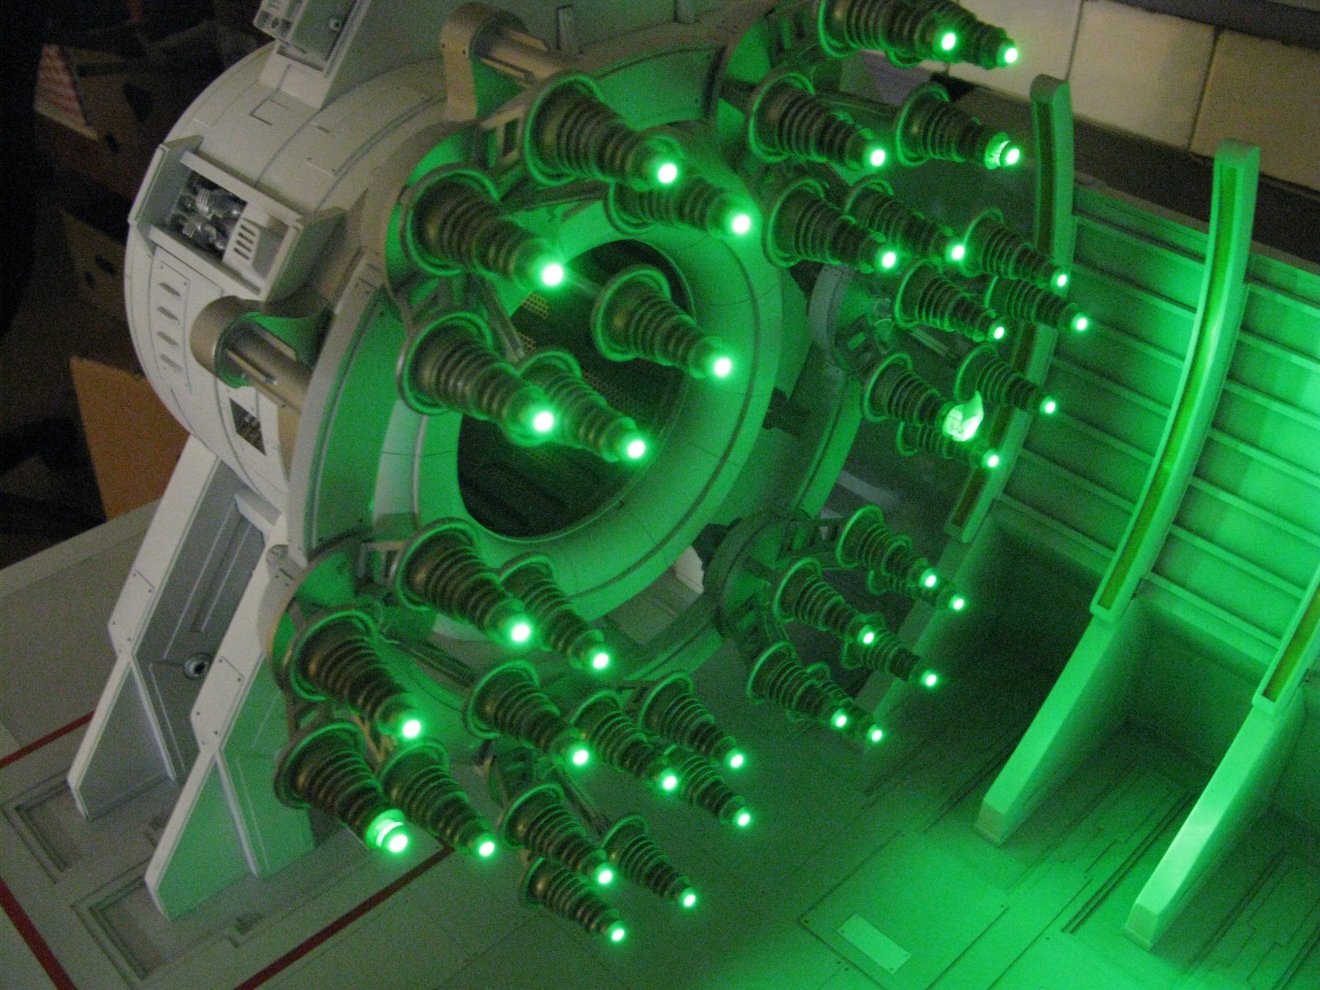
not just for xmas | Opal perspex to diffuse the light..then wrapped around and superglued in place. job done. Now the smaller one. It wasnt Xmas, so I had to buy these lights online. |
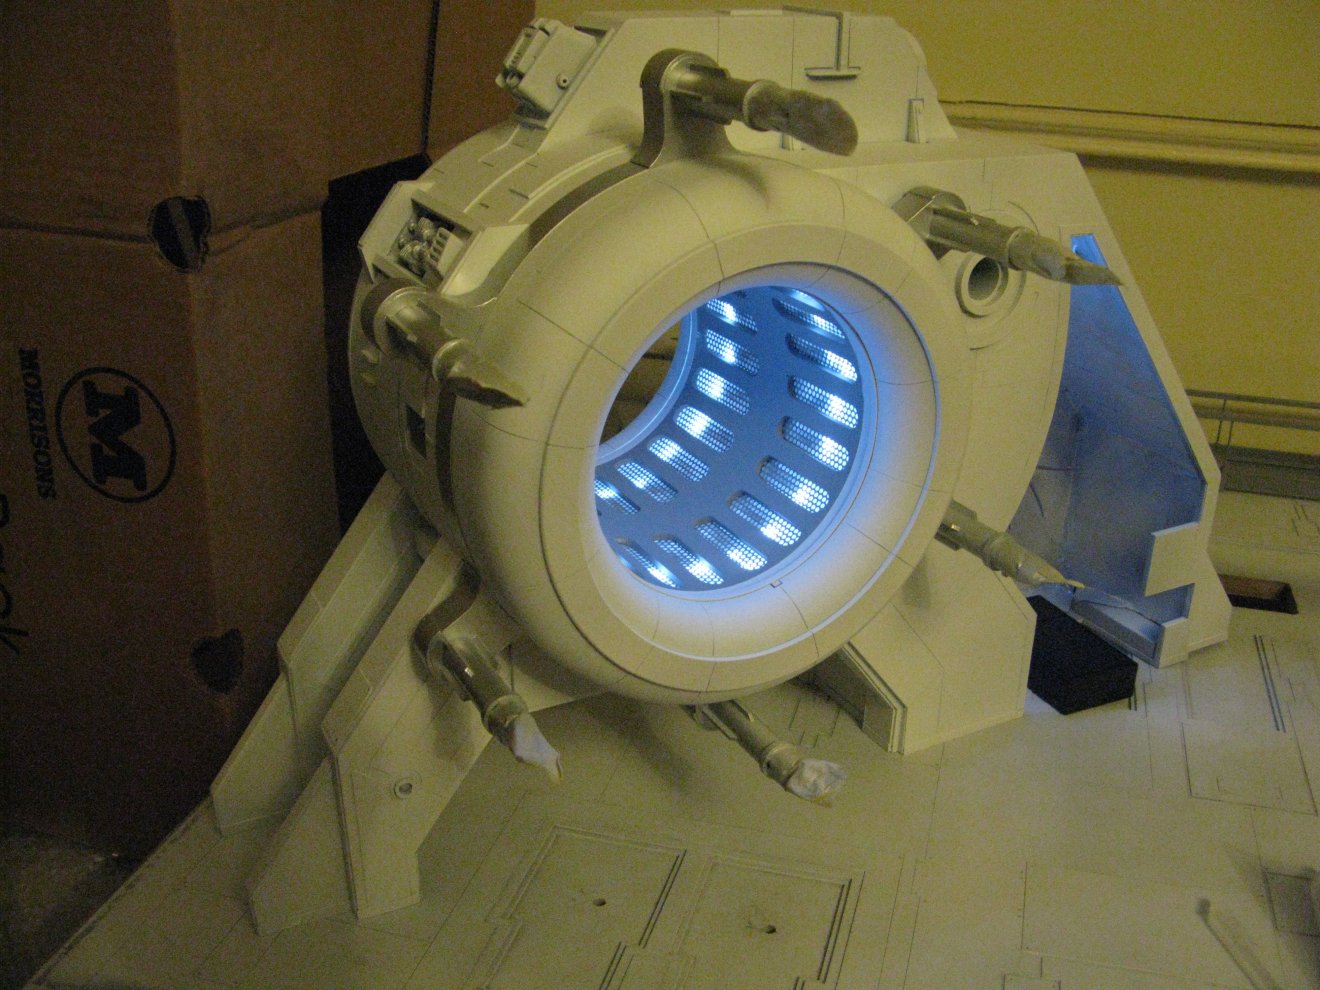 |
1 light effect | The Xmas lights work well...and were cheap, compared to a tailor made circuit-board. Unfortunately, the fast cycle I like is in the middle of the in-built sequencer of the xmas lights, which goes back to the start everytime you switch it on and off. Withnot having kept up my electronics, fixing that problem is a bit beyond me. |
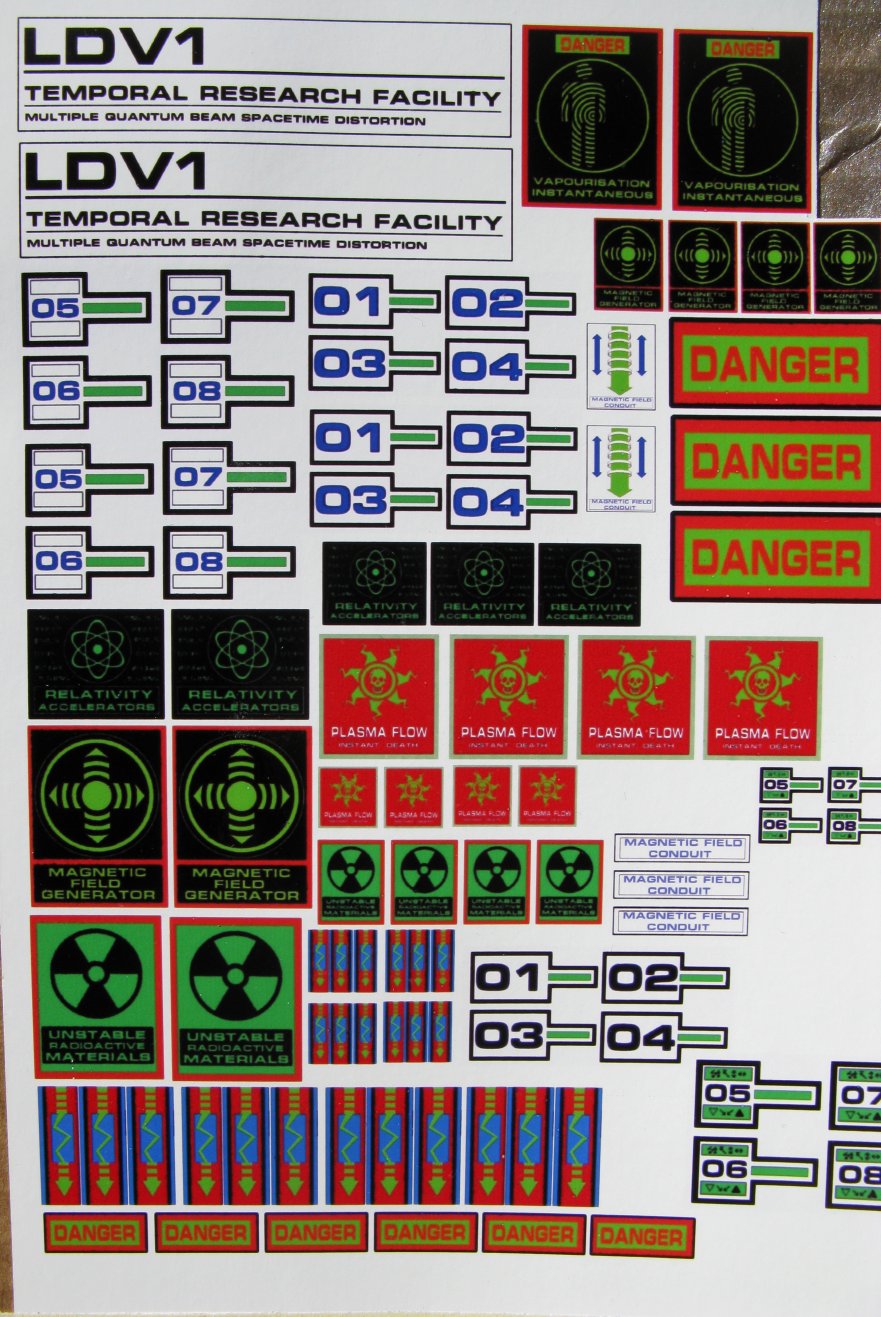 |
Graphics | Not having had any training in Graphics, I struggled designing my own for this. This is a sheet of home-made water-slides, a lot of which, I didnt end up using. "Less is more" and all that. |
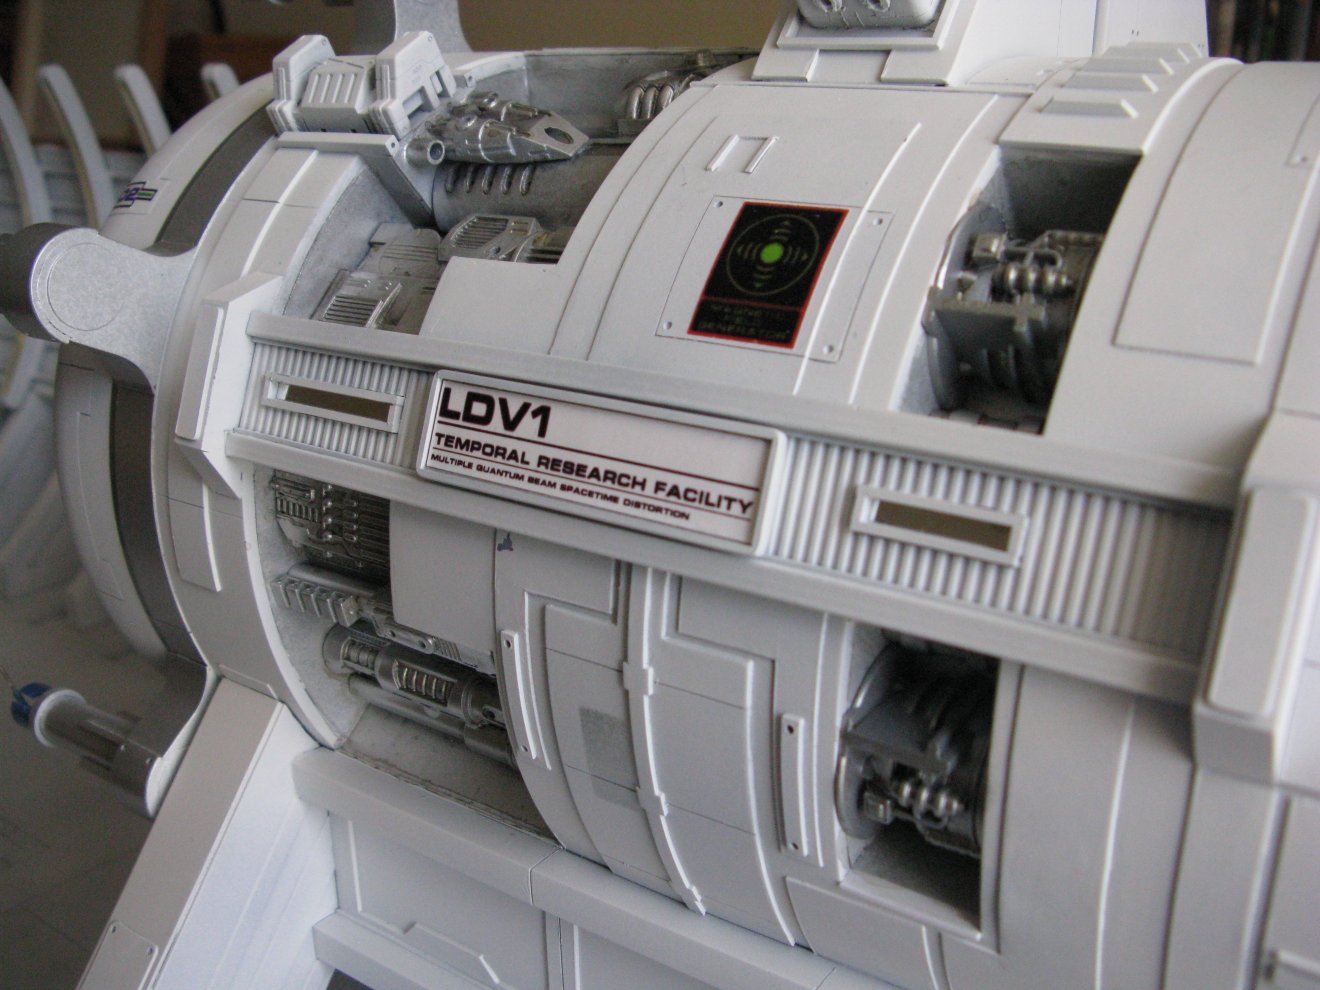 |
LDV? | What famous inventor from Italy might appreciate something like this?? |
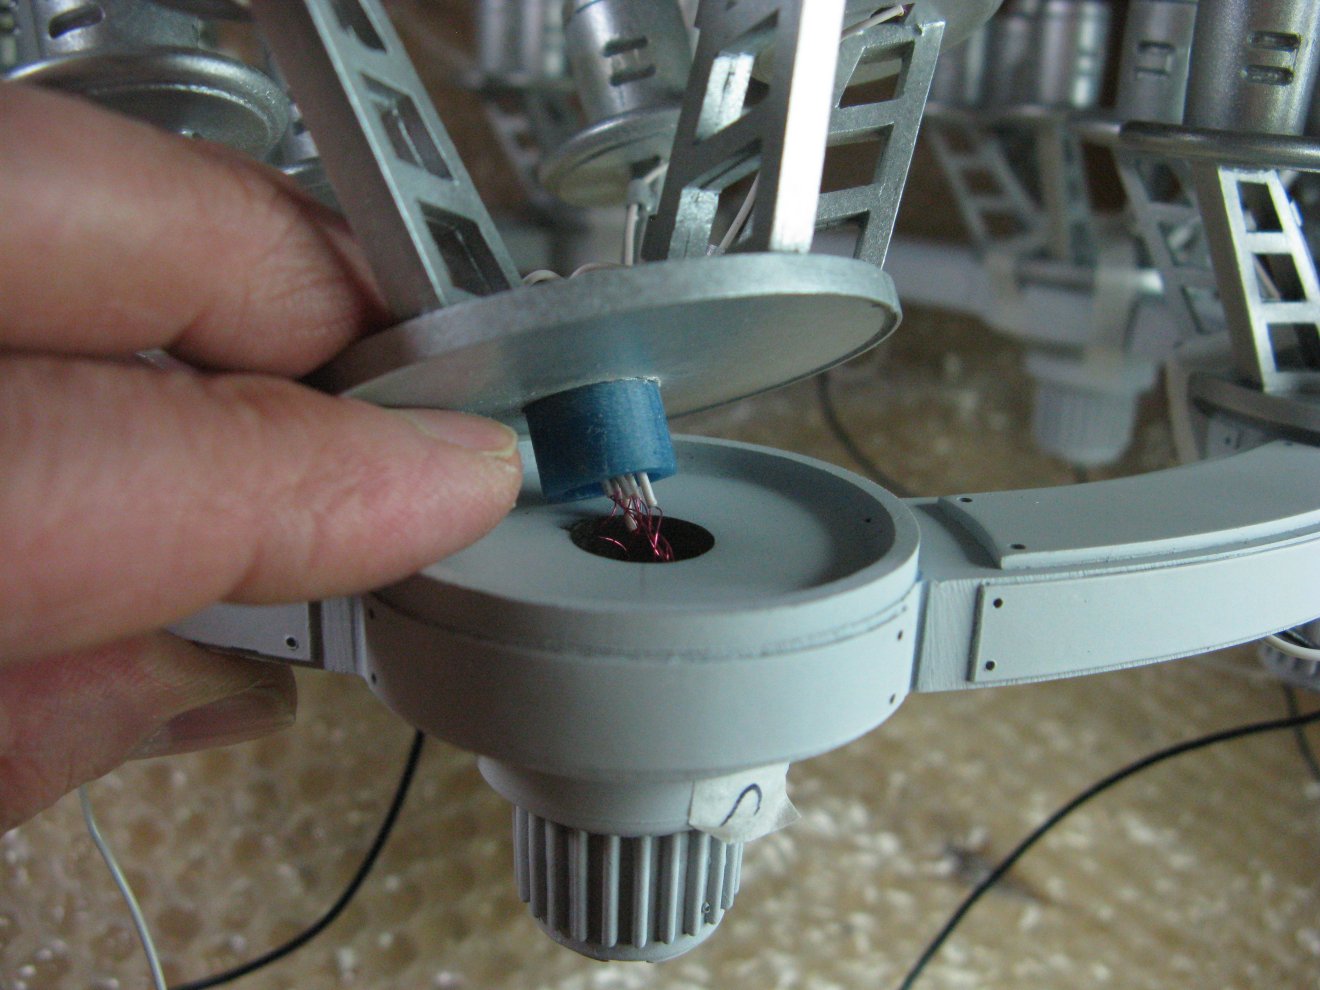 |
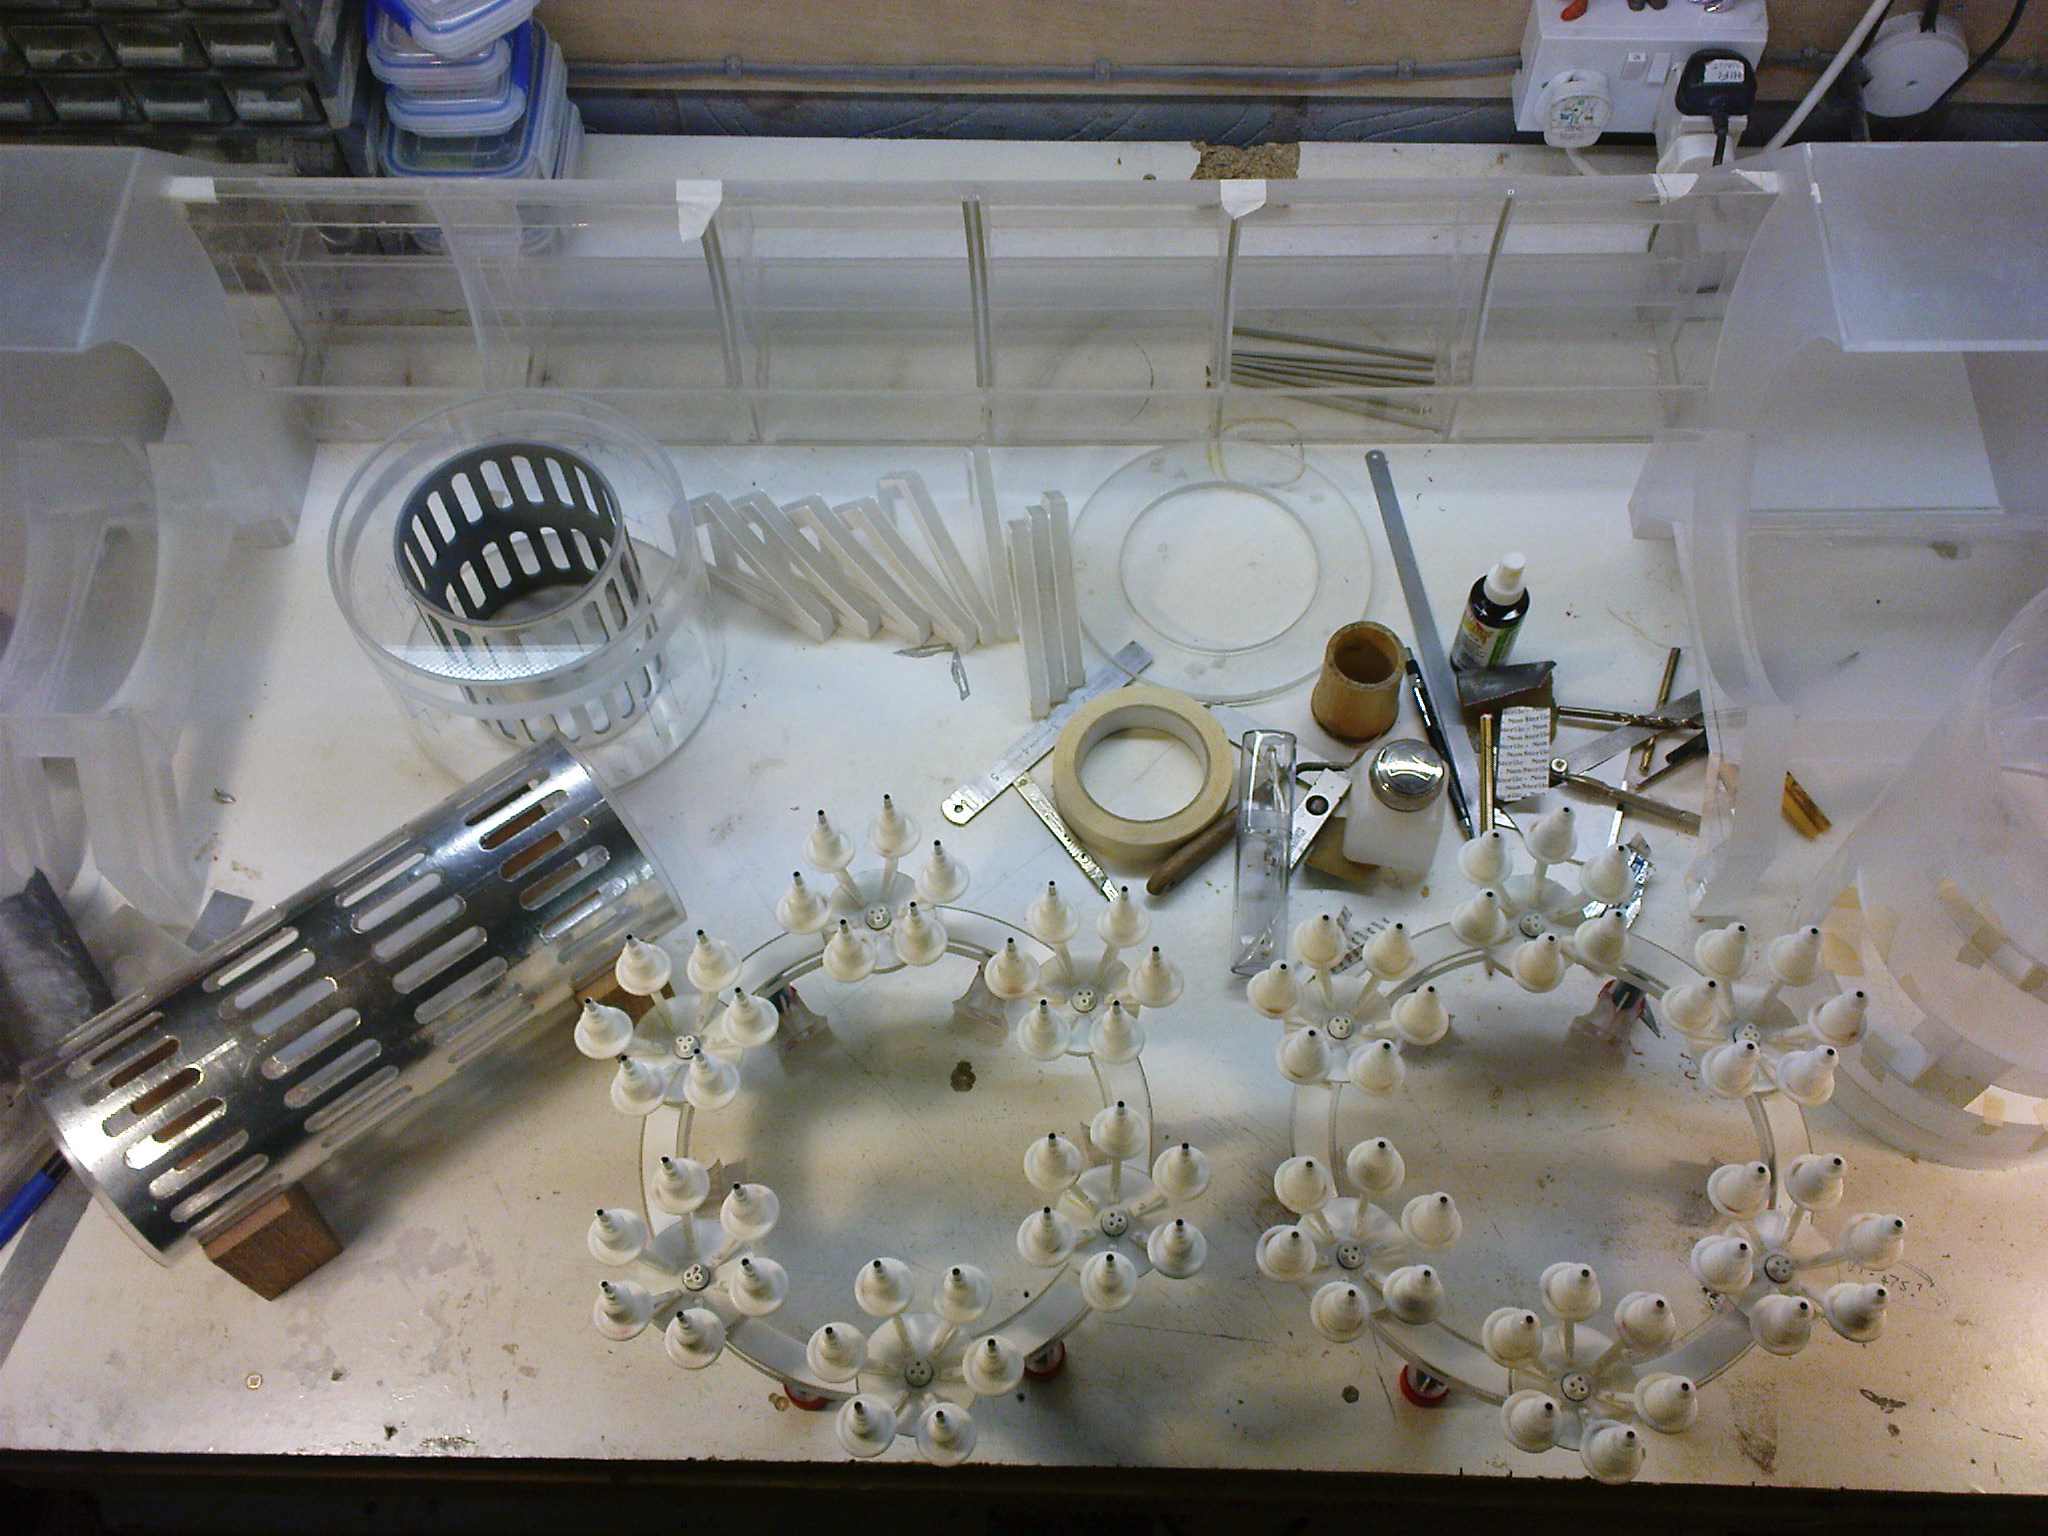
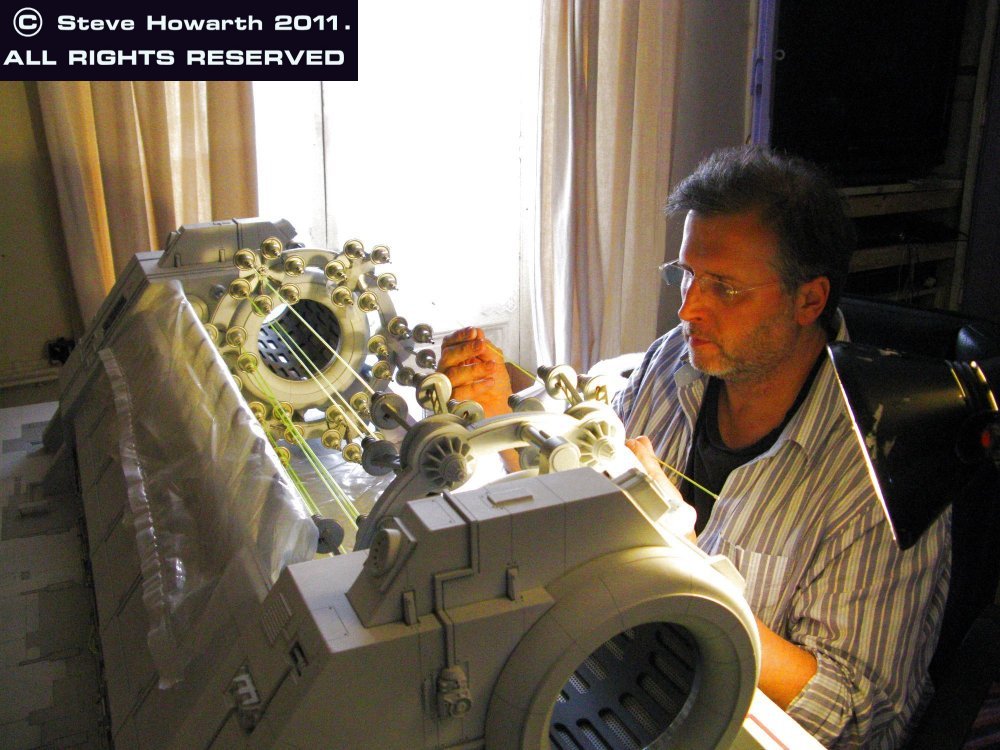
pulling my wire(s) | Each small array has been tested. Now its time to solder them onto the main ring. Pulling the excess wire through the channels and pulling the piece into place. |
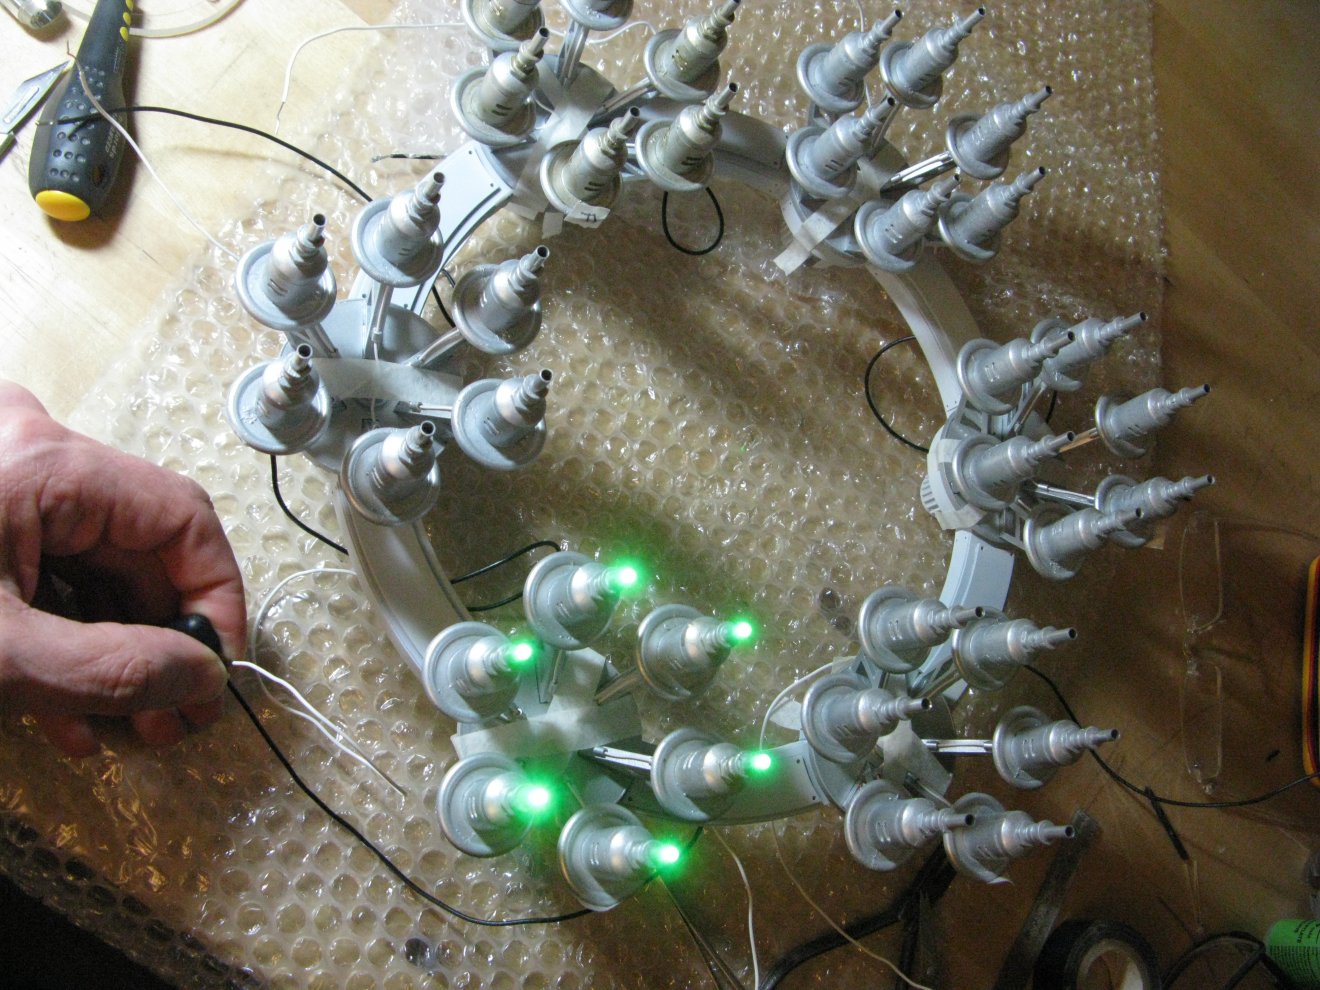 |
testing as I go. | I test each array before I super-glue it. the others in the picture were taped in place with masking tape. |
 |
Tricky | About to glue the main array into place, soldering all the pre-threaded wires to the LEDS. Patience... |
 |
Yay! They all work. | Wired in Parallel, these micro leds are high intensity. I still had to file the plastic shoulders off each one, to get them into the alluminium tubes! |
|
Oh Dear | When I got back to France, where the Time Machine had been stored, the MDF base I had made had expanded with moisture (I'd been gone a winter and the heating was off) the perspex sheet covering it had split (well it was an old piece of extruded perspex) and the only way to keep it down was to screw it to the base. You can see the screwheads here, which I later filled. Still visible even after filling and spraying, they need covering with detail. which worked out pretty good in the end. I know a Perspex base would have prevented this, but 1) I couldnt afford it, and 2) it was always going to be indoors and so wouldnt suffer from moisture. Never figured on my French house being so DAMP and MOULDY |
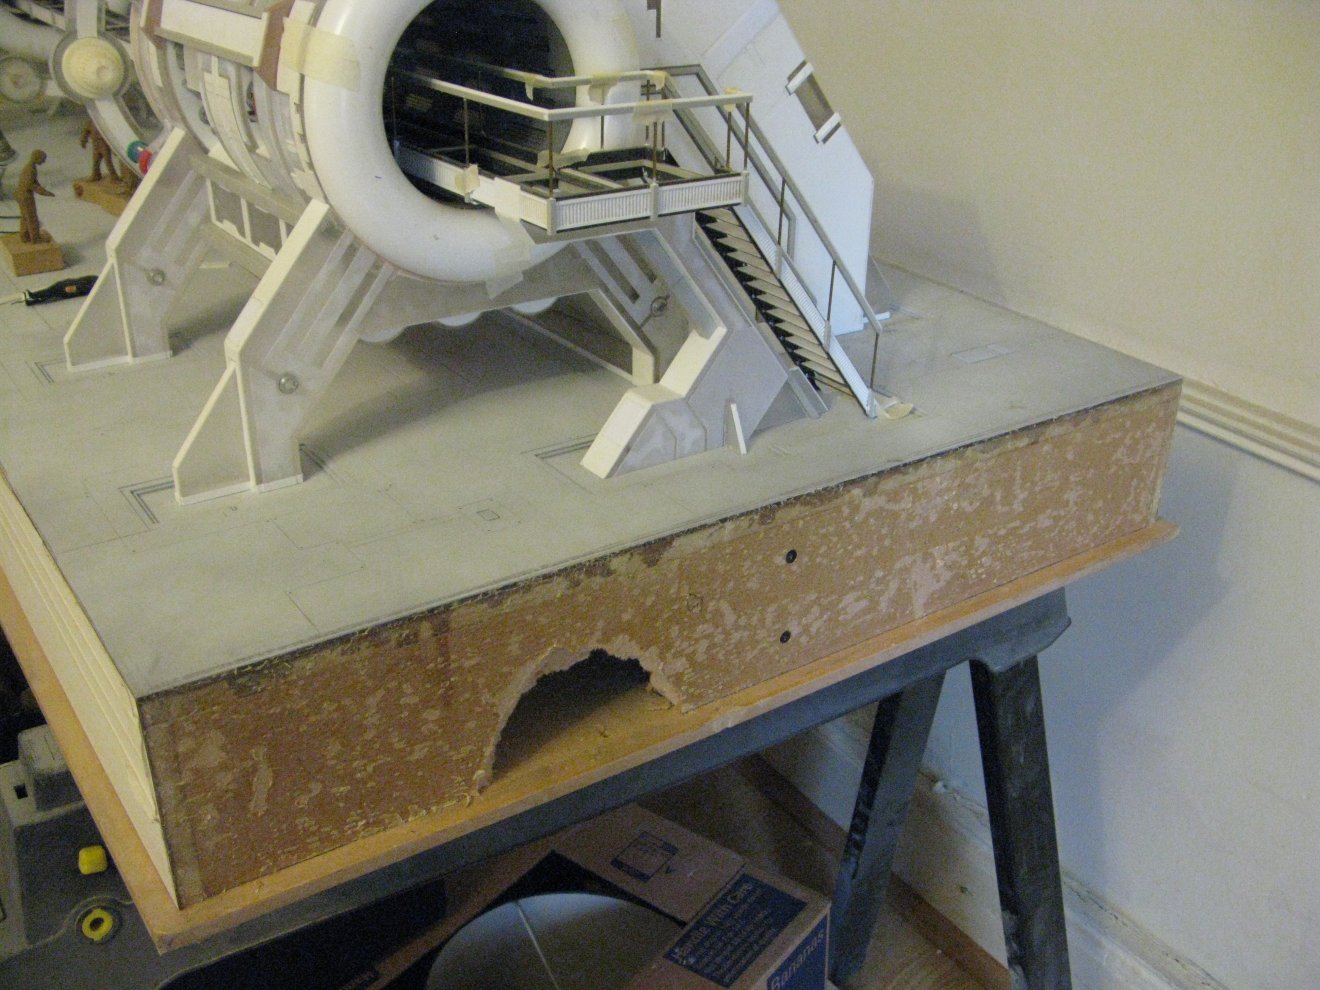 |
Oh Dear Oh Dear | When I first came to this house I had a little accident in the van and the steel pole from my circular saw went through the base of my model. could have been worse, could have gone through the model itself - lengthways! Even so, extensive repairs as I had to remove the 6mm mdf which had of course been screwed AND glued on. I'd left a hole for the electronics, but I couldnt get to this hole due to a support strut. Just as well, as there was MOULD growing inside, which Ive now fixed with some bleach. That Mediteranian atmosphere! I was lucky I had ONE piece of .5mm formica to repair which Id left in my old garage in the uk, but was allowed to look. It was on top of the units just where I'd left it. |
 |
has to be green | As the distributors for this particular shade of green were out of stock, I went directly to their suppliers in switzerland. They were kind enough to send me TWO free samples. which was just enough for me to do the stairs and walkway. About time I had a bit of luck with this. |
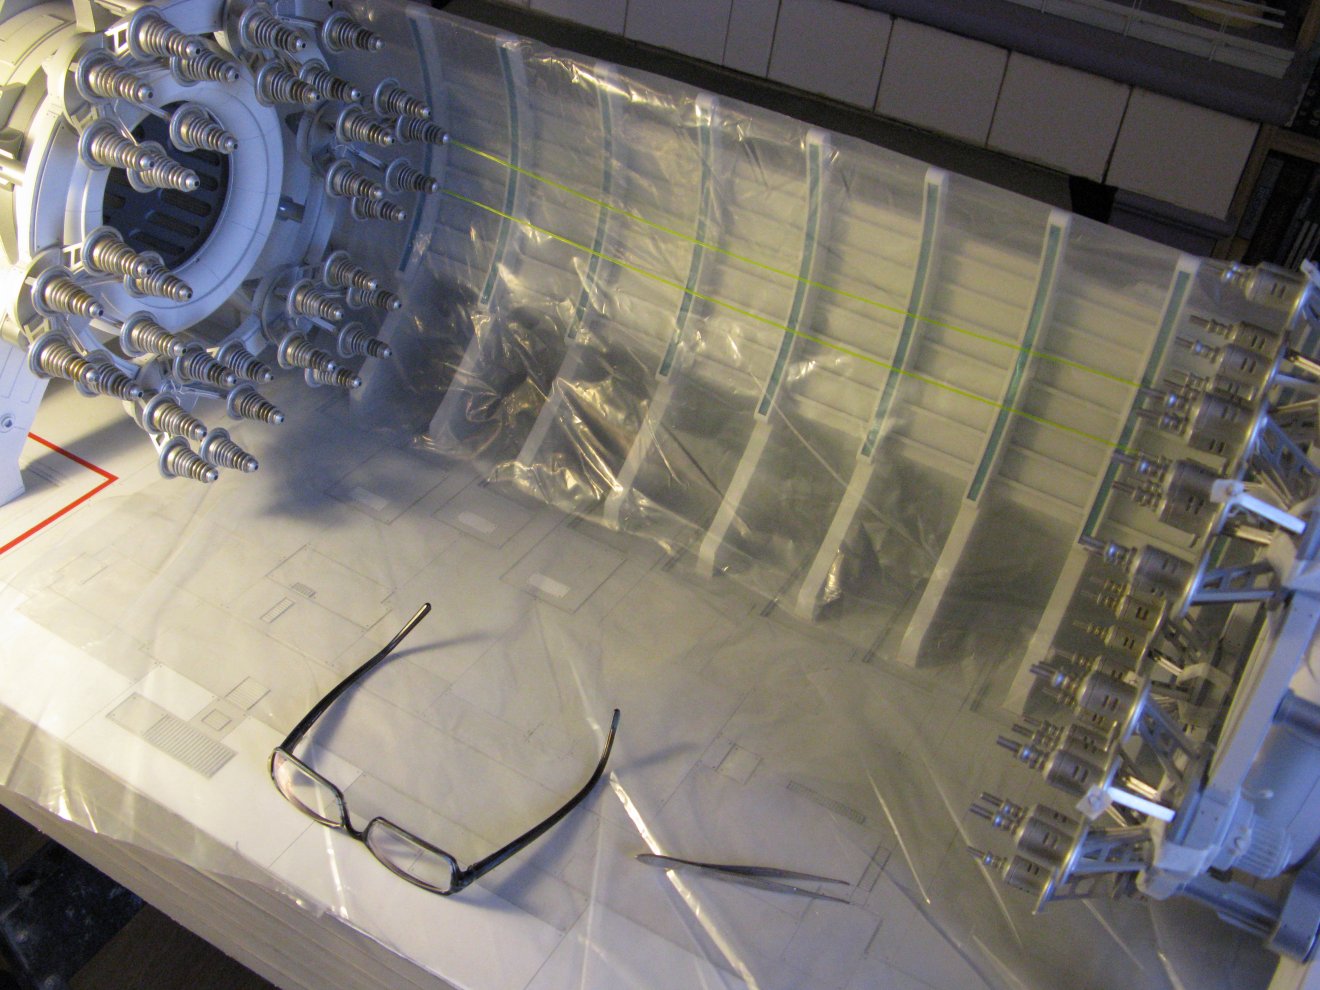 |
Polythene cover | Trying to keep a model clean over such an extended period wasnt easy, but my architectural experience helped me be ever mindful of this. Polythene, just in case a drop of glue went astray, or dirt from my sleeve. |
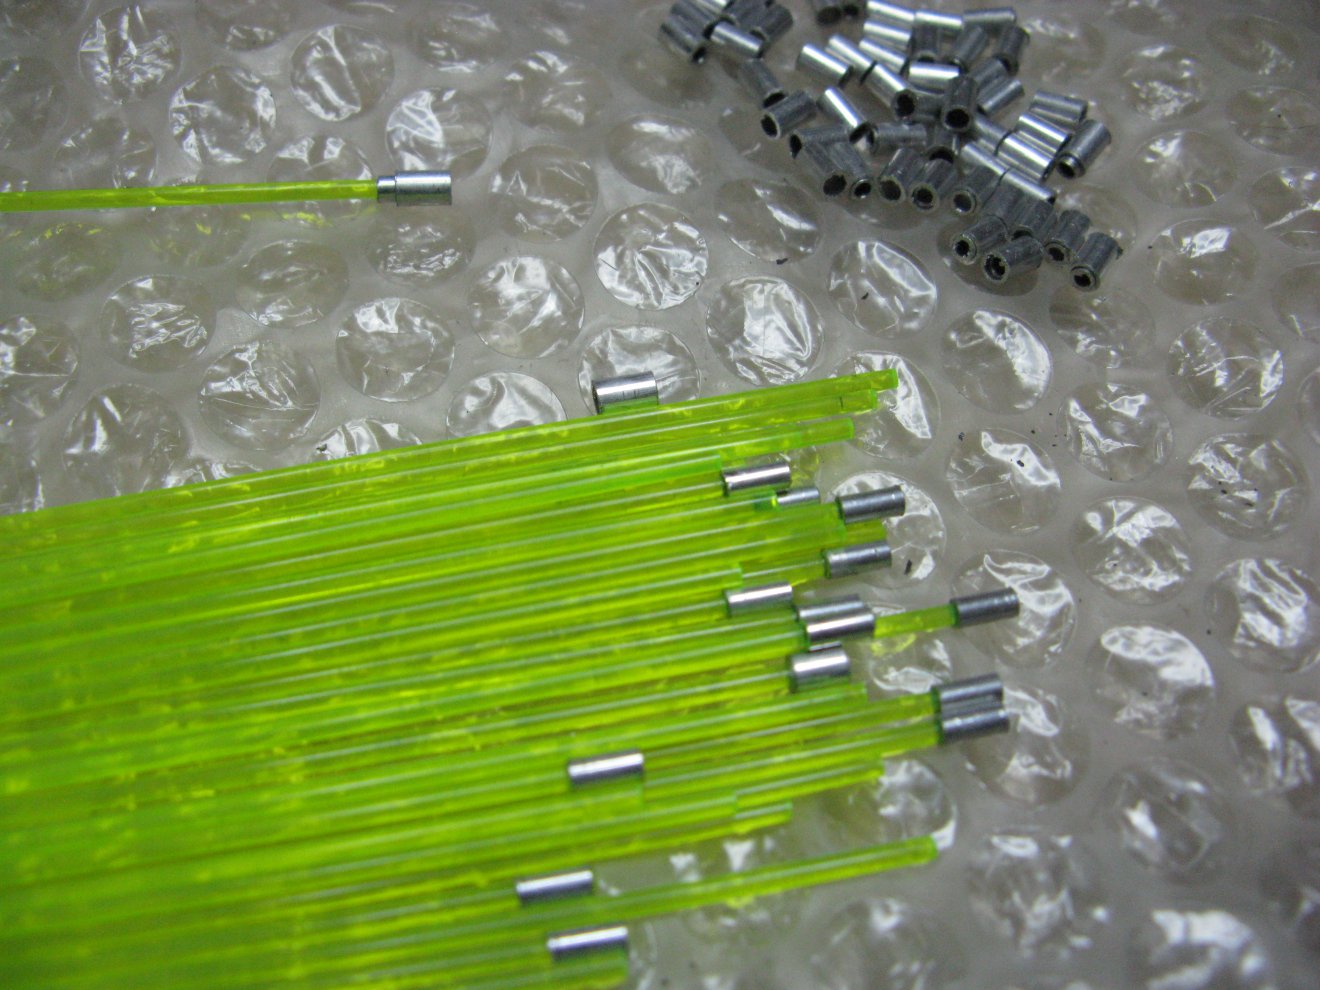 |
UV rods | Two sizes of aluminium rod for each end, so it would fit snug into the LED housing tube in the arrays. |
 |
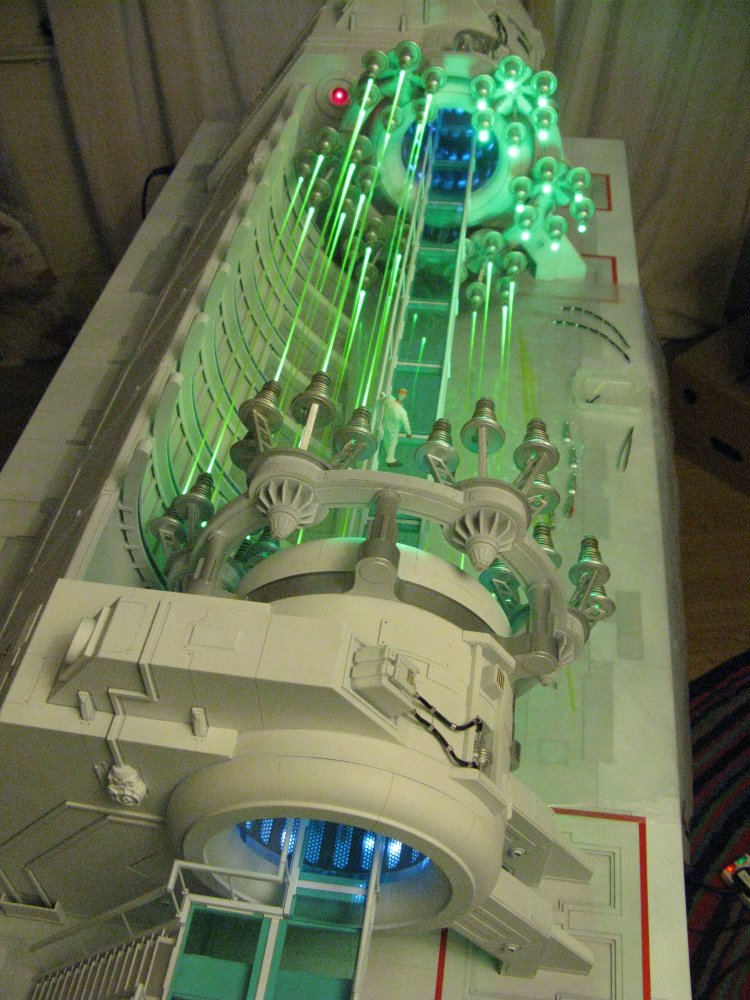
UV string | Not available in the UK anymore, I had a little from years back, when it was. I tried a piece in a blank slot and had a black light out of shot. Turmoil as I wondered whether to go forward with the rod, or unglue the 24 Id put in and cut holes in the base for black lights. I was strapped for cash, so importing from the USA lost out in the end. This is the kind of power I was after though. Plus, the string is slightly elastic and could be glued in under tension and stay straight. I had problems with the rod once the temperature got over 28 degrees, they expanded and sagged! In something so complex, this was the thing I overlooked. |
 |
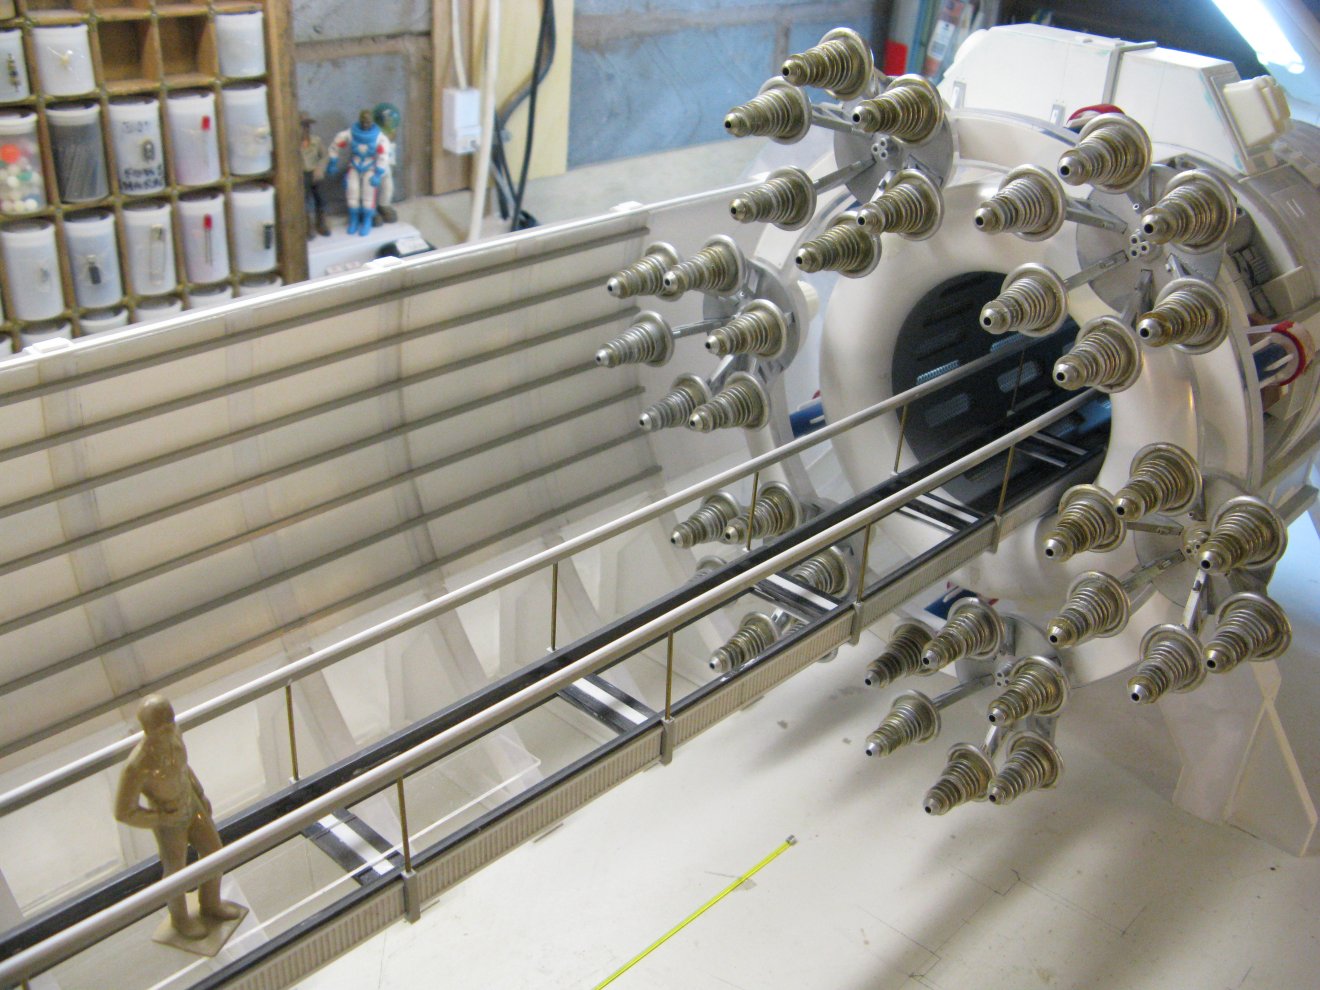
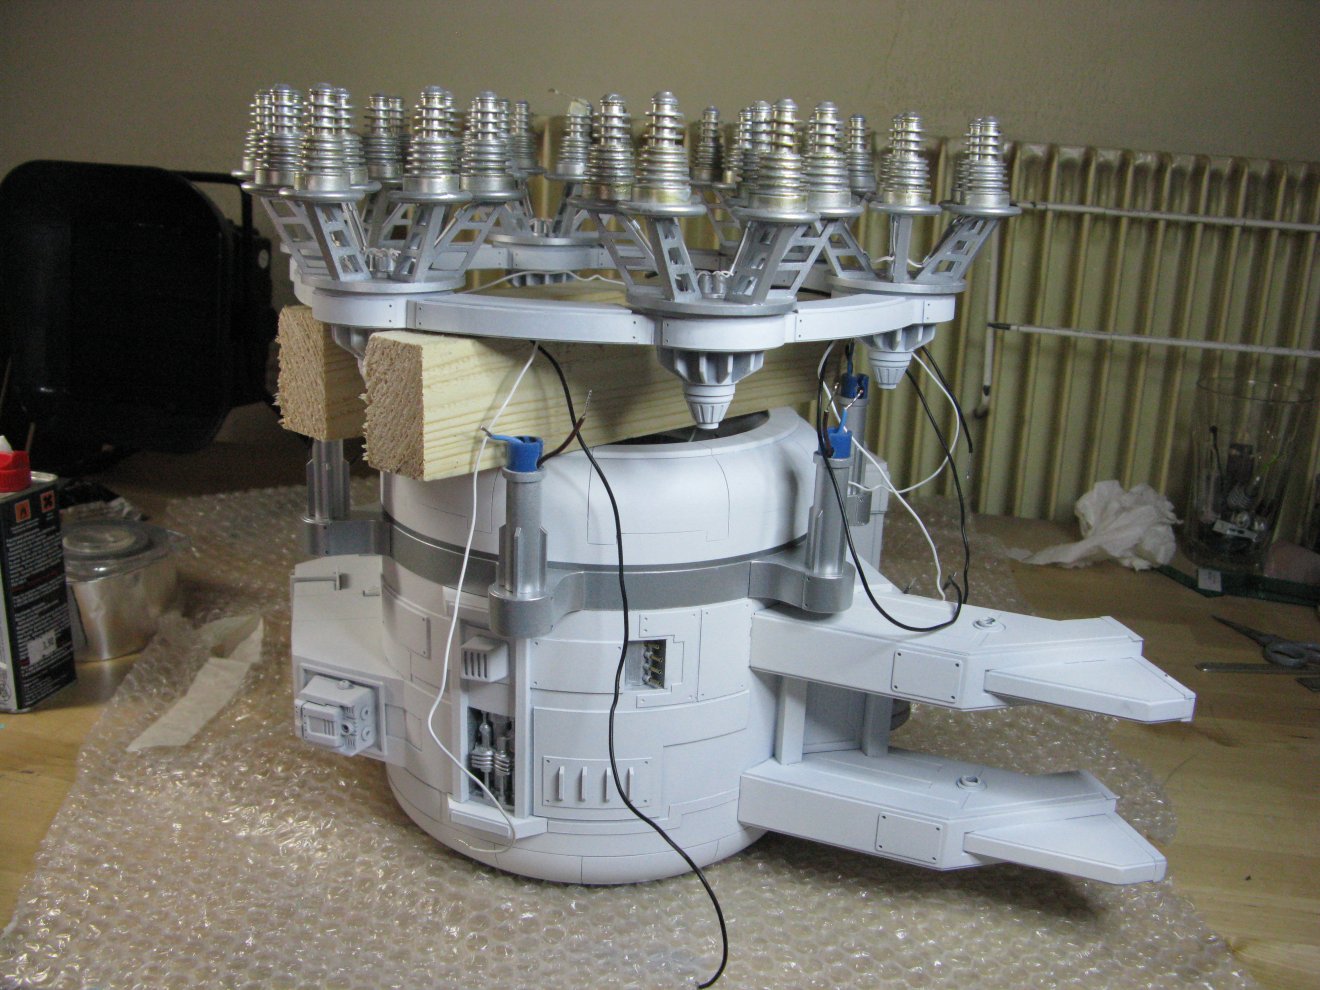
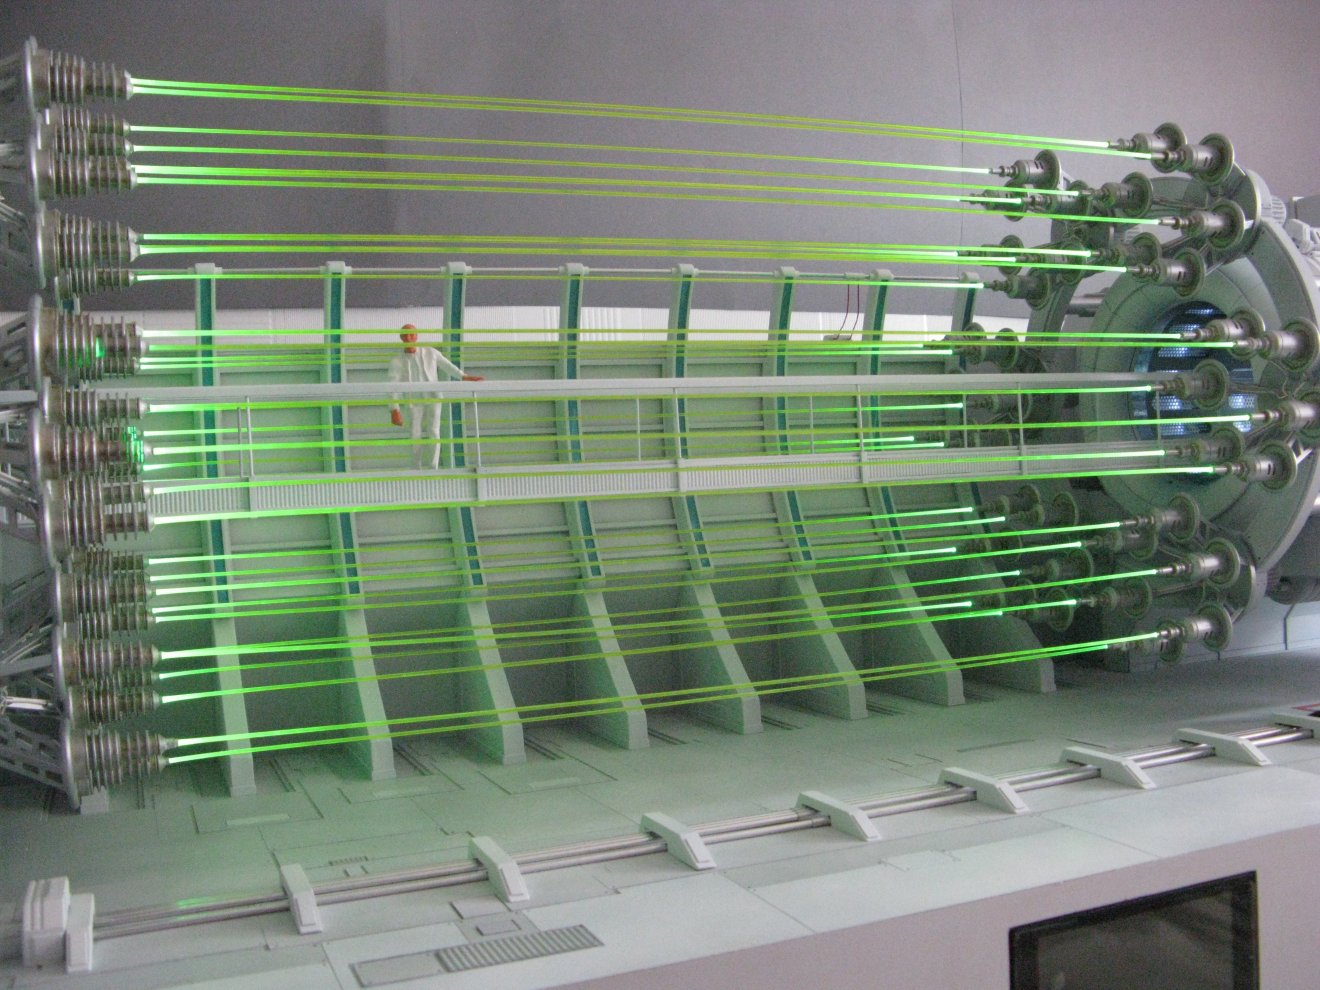
Dyson nozzle gone. | NOW you can grasp the size of this thing!! (ooh err missus)I removed a Dyson nozzle that was sticking out of my head with paintshop. |
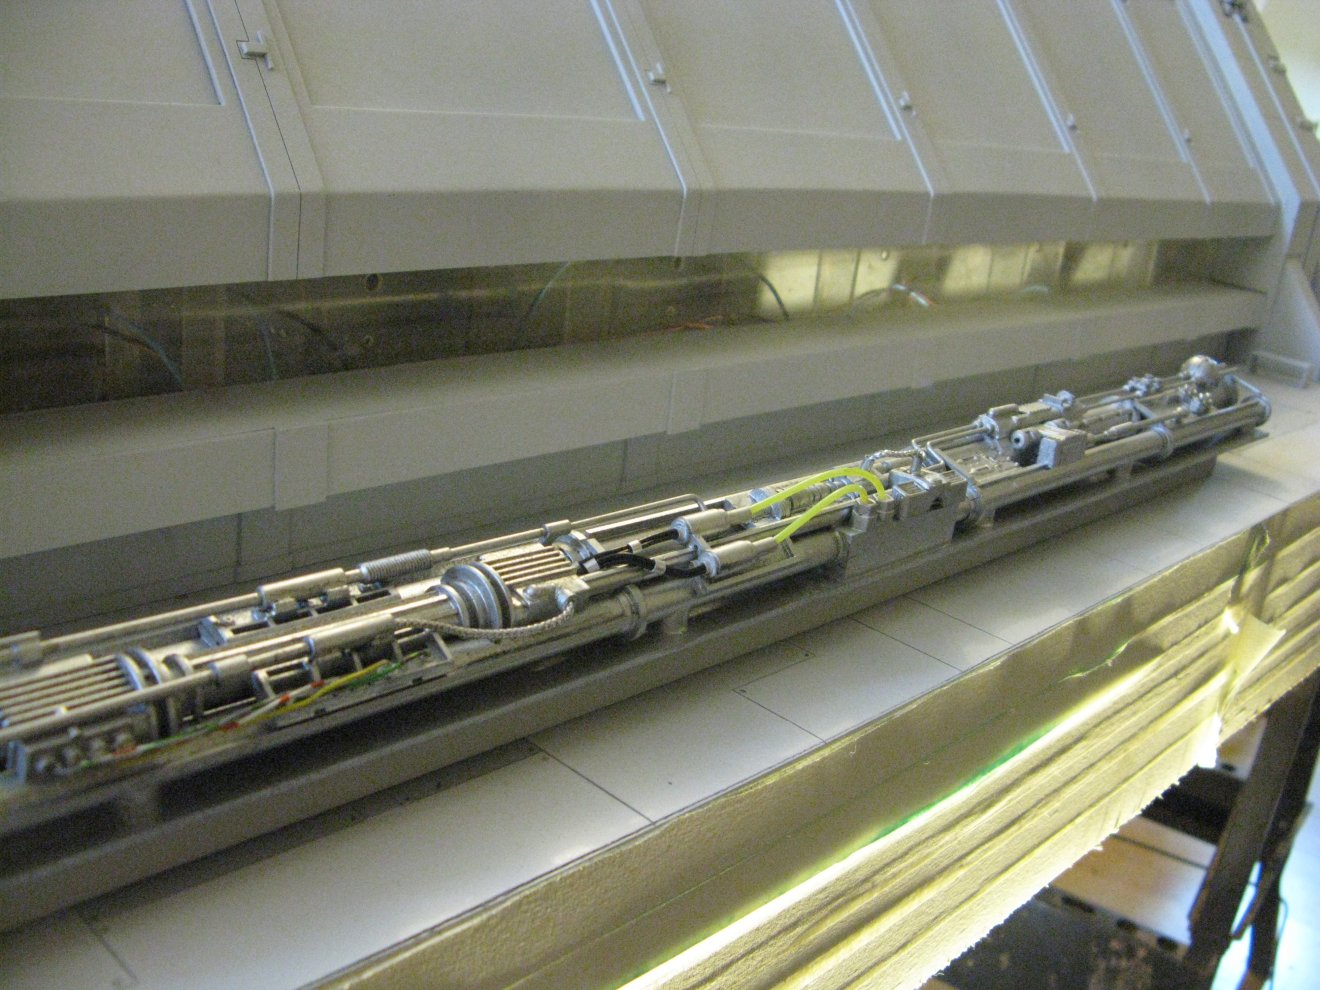 |
spinal piece insert | This silver wont look so modelley, once I've dirtied it down with some 'dirty-down' spray from shepperton stores. |
 |
Light at the end.. | Still not finished, but an interesting camera angle. Got to get that depth of field sorted. |
 |
getting there | You'de never guess what goes on behind closed doors, would you? People making model TIME MACHINES??? |
 |
warning light | You can see Ive not glued in 12 rods. This is intentional. access to rods (for adjustment) would be impossible with these last filaments in place, so if they moved a lot during transport (in the back of my estate car as I returned to the UK...over 600 miles) Id be scuppered, so I left them out. If only I hadnt SLOTTED the spinal piece, then I could have unbolted and got access that way. More Hindsight. There's been three lots of that on this project. The beauty of all this, is I can go back and sort that with a razor saw! |
 |
at long last | Not the best set of photos, without a proper studio and in cramped lodgings, but the first set of it complete. |
 |
Neccessity... | ...being the mother of invention. Those screw-heads I had to disguise, worked out well I think. actually improved the overall look. there would have been a bit of a blank space there. I think I origianally was going to put a recess, but thought ;'sod it' this is taking forever as it is! As this isnt a paid job, I can do that. |
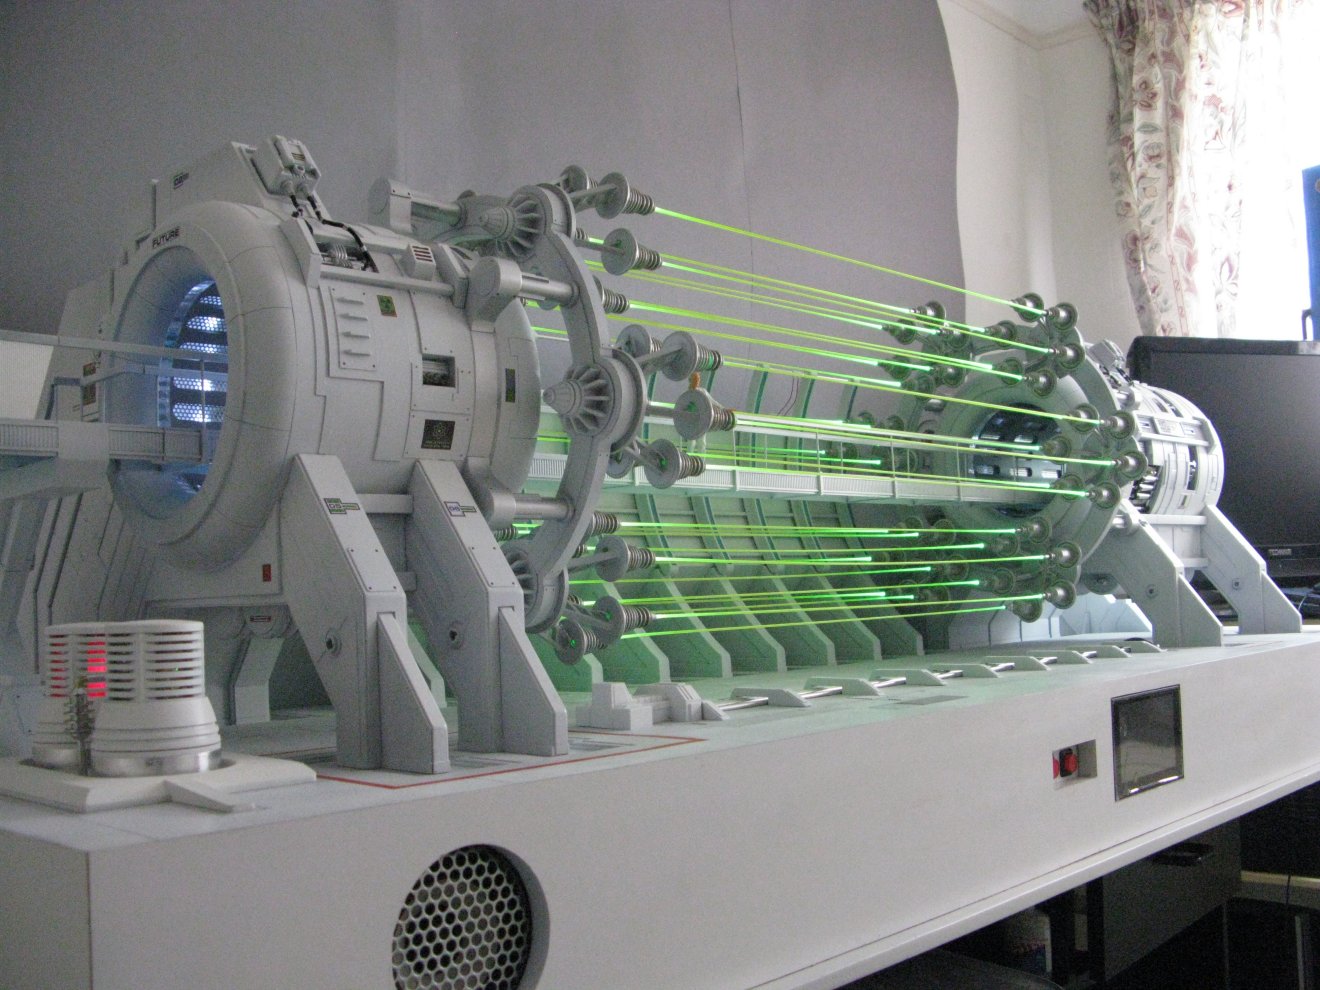 |
long shot |
The loudspeakers are for the small film Ive made and displayed on the screen in the middle of the baseboard. Sound effects and SKETCHUP animation blended together to give an impression as to how this contraption moves and builds up speed to a high level. |
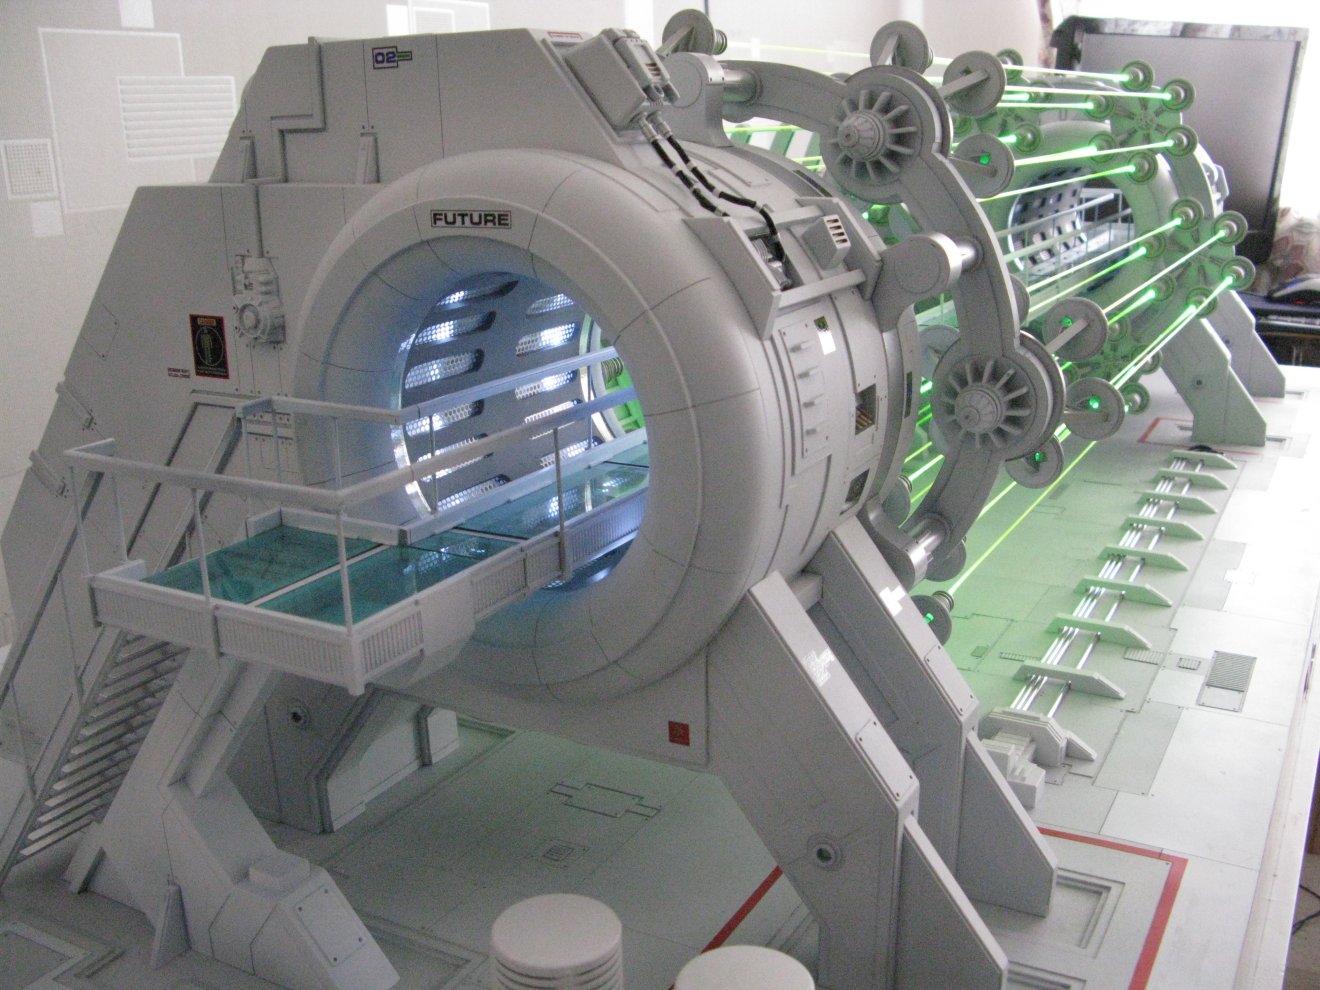 |
angle1 |
I intentionally made this Asymetrical so that entering from different ends meant you either travelled into the PAST or the FUTURE, as the very obvious graphic shows (well, even scientists can be forgetful, you'de need reminding at the last minute, that you were at the right end) . |